Imagine such a situation: it is 6:00 AM on a Saturday morning, you are laying comfortably in your bed, still sleeping soundly. Suddenly, you hear your cat scratching on the door, its loud meows become unbearable and your cat has all the time in the world to let you know what its needs. Do you know what it really needs?
Imagine such a situation: it is 6:00 AM on a Saturday morning, you are laying comfortably in your bed, still sleeping soundly. Suddenly, you hear your cat scratching on the door, its loud meows become unbearable and your cat has all the time in the world to let you know what its needs. Do you know what it really needs? I know – your cat wants food now! Right now! How do I know that? Because at some point I started feeding my cat at that time… And, of course, it became a new standard time for getting food.
This scenario inspired me to build an automatic cat feeder, which would remove the troubles of morning cat feeding and keep the cat happy.
First generation
The first generation of the cat feeder was a simple MVP made of some cardboard, simple servo and ESP WeMos. It used servo to rotate the top container by 180 degrees to dispense the food.
A microcontroller was connected to my local Wi-Fi and communicated with the Smart Home server running HomeAssistant over the MQTT protocol. Thanks to that, I was able to use the HomeAssistant automation system to schedule feeding and dispensing food through Google Home commands. Each feeding was defined as a special event in the Google Calendar. It allowed me to easily control the cat’s feeding time and change it when necessary.
Of course, this generation encountered some problems:
the top container would sometimes detach from the servo handle and spill the whole food (I called it “the Jackpot Effect”),
it didn’t have the best design,
the cardboard started to deteriorate.
As with most MVPs, it was used for only 2 years until it broke.
Second generation
I decided that next cat feeder should:
be built from 3D printed parts,
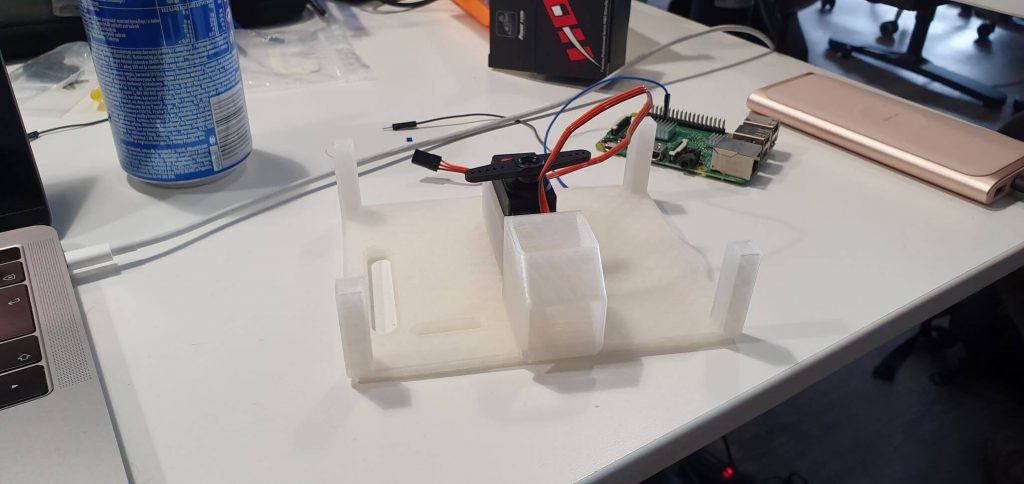
use Raspberry Pi 3,
have a small camera to watch how cat reacted and what the animal was doing.
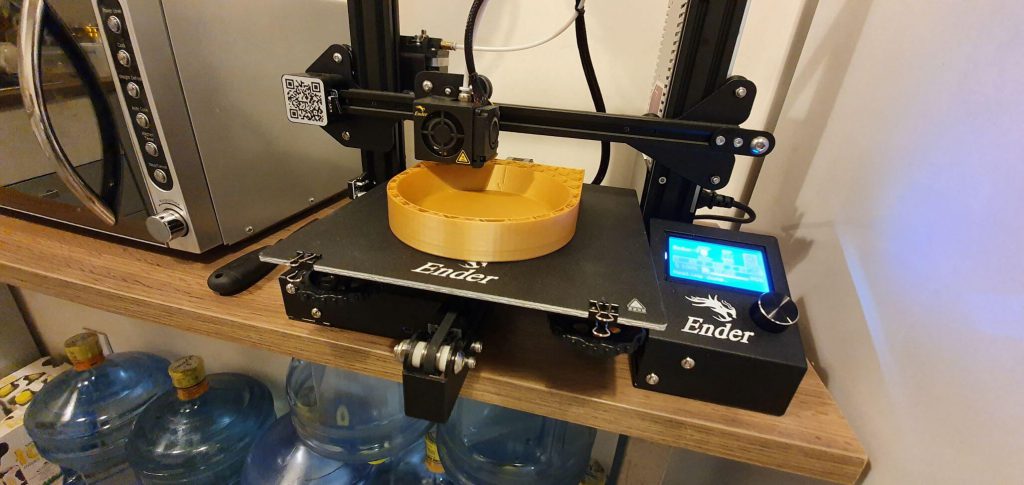
I started whole process from designing basic elements for food partitioning. Then, when the designs were ready, all elements were printed using the Creality Ender-3 and PLA
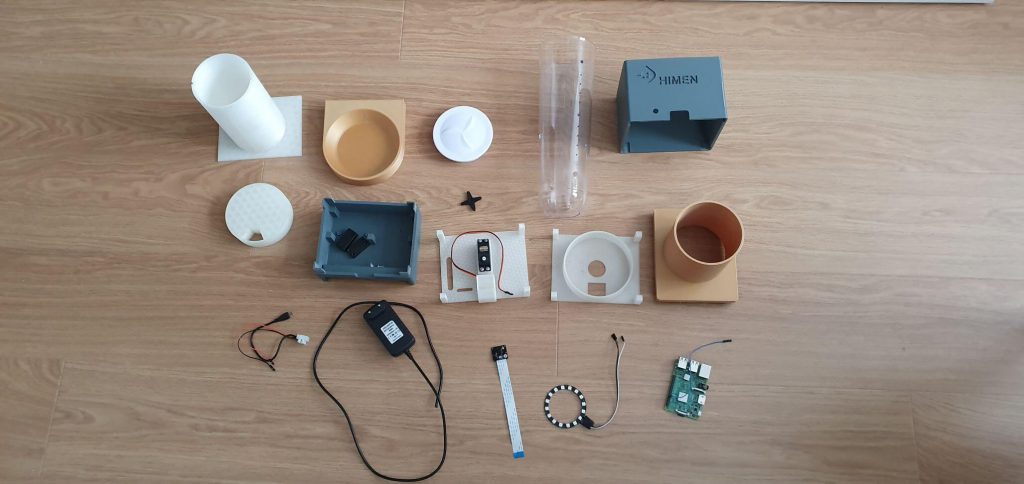
Parts
After ensuring that everything worked, I proceeded to designing and printing the rest of the parts:
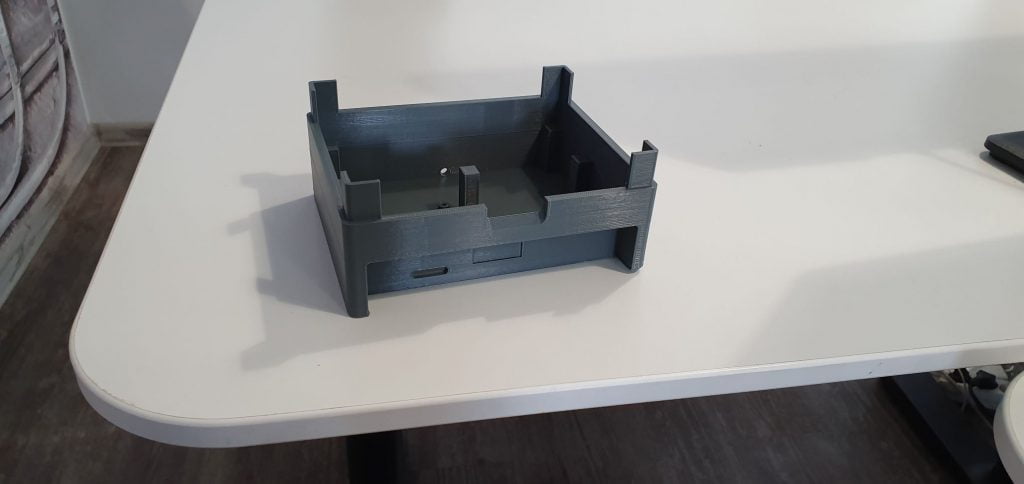
Base for RaspberryPi (Level 0)
It has special places for screws to help install Raspberry Pi. Additionally, on the front, there is a small hole for easy access to Raspberry Pi’s SD card.
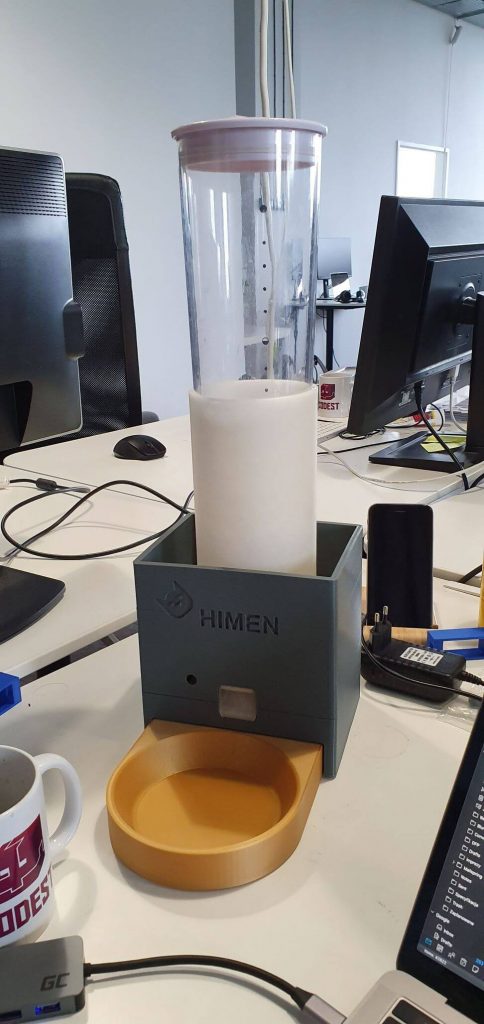
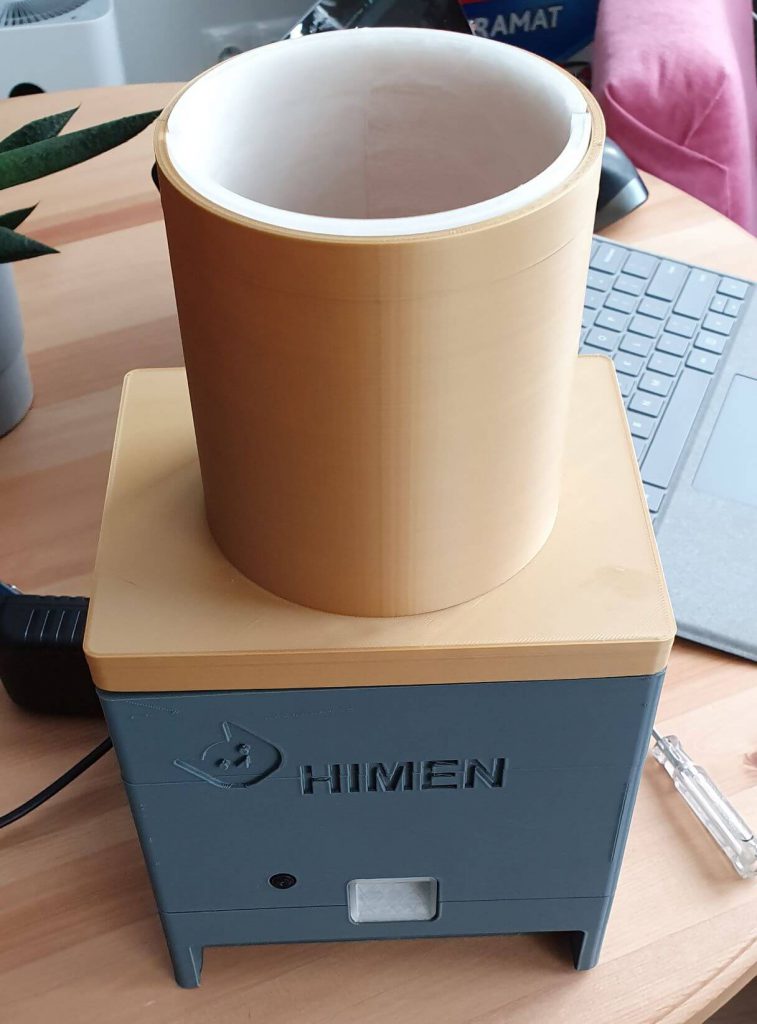
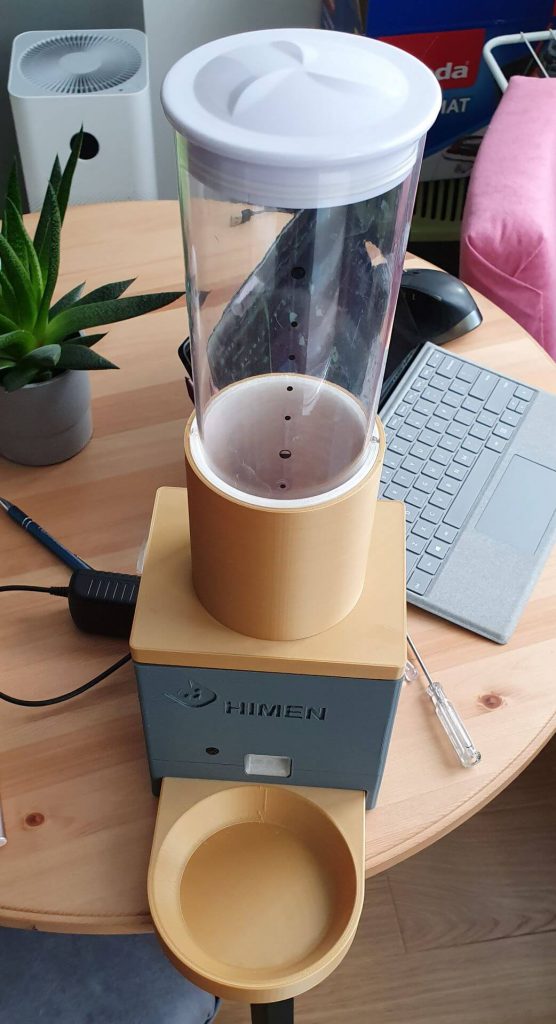
Bowl holder
This plastic part is used for placing a metal food bowl (of course, it was printed with gold filaments, for my cat’s fame and glory). It is connected with the base using 2 neodymium magnets.
Servo holder (Level 1)
This level is used for holding the servo while it rotates the part on the next level. It also has a small slope for better food serving.
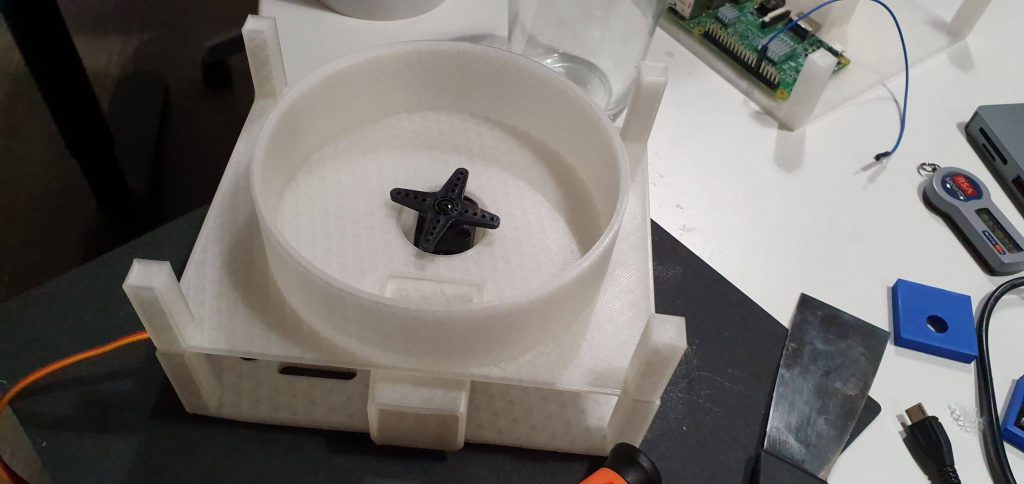
Ration mechanism container (Level 2)
This is a simple generic level that portions food from a container placed above. It is rotated by the servo.
Food container holder (Level 3)
This part is used for holding the food container. It is the only plastic part that was not 3D printed. I wanted to minimize food contact with 3D printed parts. In theory, transparent PLA plastic doesn’t have any toxic contaminants, but I bought the cheapest cereal dispenser and took the food container part, just to be on the safe side. Also, it looks really cool.
Housing and lid
The last two parts were the housing and the lid. Nothing special here, except for more gold to make it look better and win the cat’s admiration.
All parts
Final assembly
Software
Raspberry Pi is running a Raspbian provisioned using the ansible playbook to run these services:
MotionEye
MotionEye is an open source software for building your own private monitoring. It detects any camera connected to Raspberry Pi. Additionally, out of the box, you get motion detection, an endpoint for sharing the stream and webhook support.
Servo service
This service controls the rotation of the servo. It is a simple Python script that connects to the MQTT server running my Smart House software and awaits for a message to trigger the rotation.
Led service
Just as the servo service, it implements a protocol for light source controlled by the MQTT in HomeAssistant.
Home assistant automation
And, finally, the HomeAssistant automation that triggers feeding.
It triggers food dispensing in two situations:
when the feeding time pops up in the calendar,
when the International Space Station is above my home location.