Hi! This time, we’ve prepared another set of useful commands to help you familiarize yourself with using the terminal. The first part of the tutorial can be found here: Beginner’s terminal – part 1.
Terminal – Theory
Where am I?
date – If we have such a need and desire, we can check the current date in the terminal.
damian@rubydev:~$ date
wto, 7 sty 2020,
Joining and listing
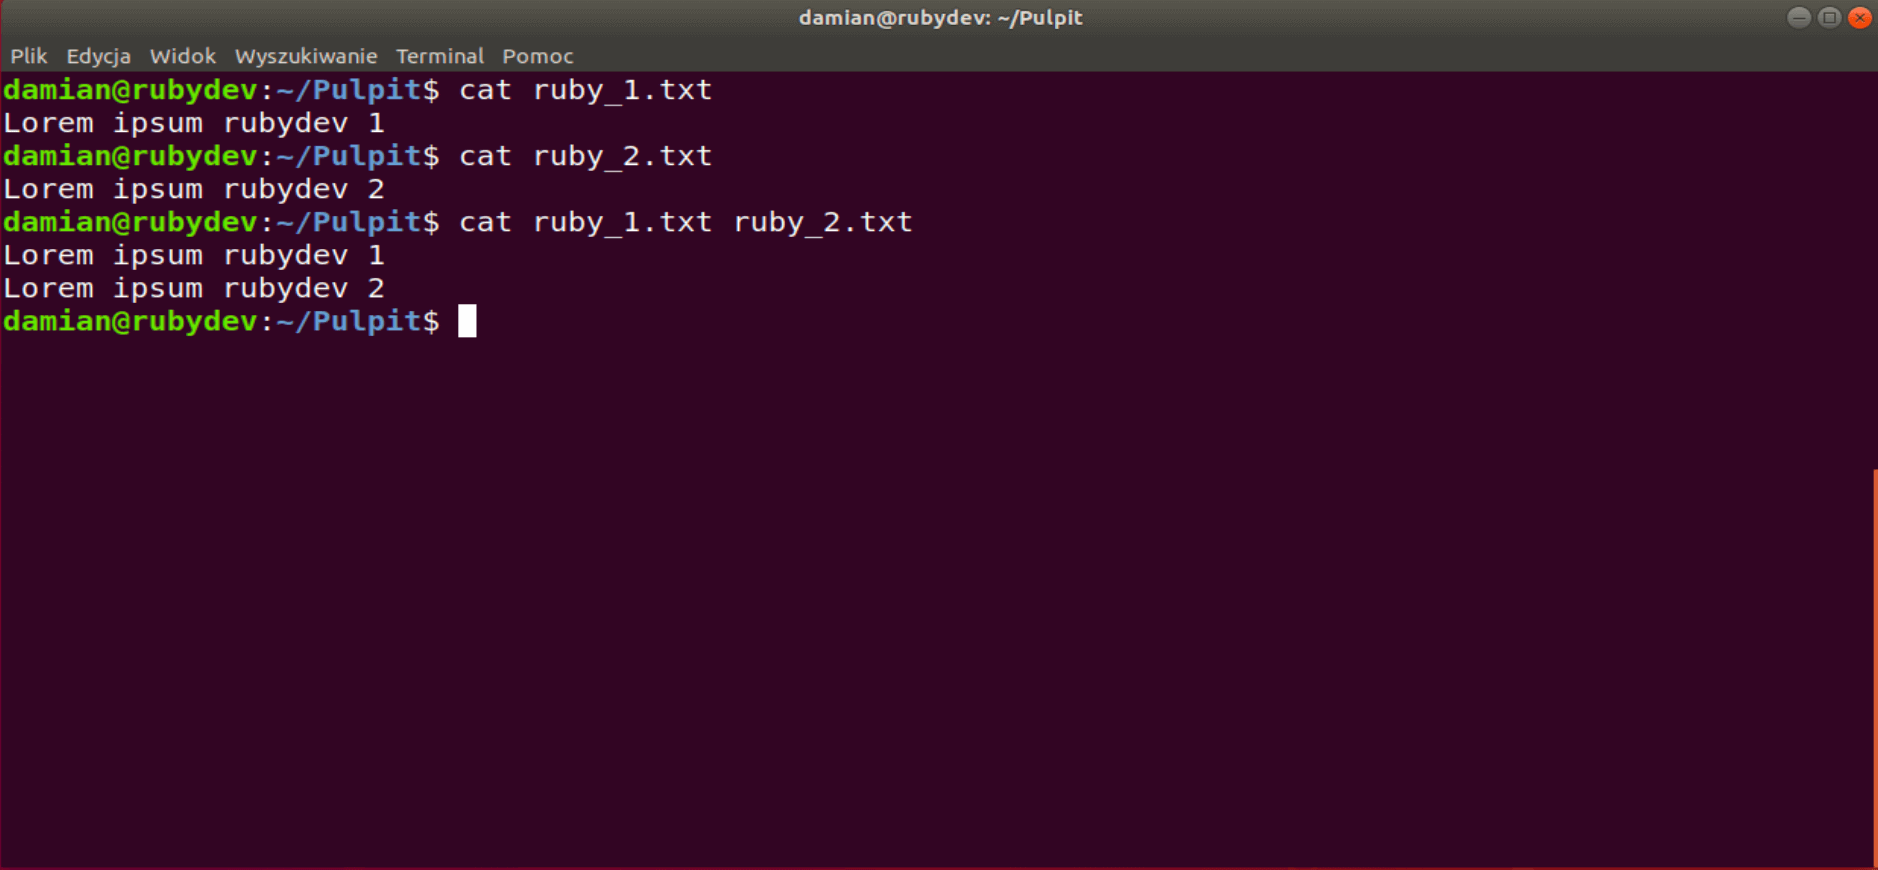
cat (concatenate) – this command has many uses, but the most popular is displaying the contents of files.
In the example below, you can see two files – ruby_1.txt and ruby_2.txt – along with their contents. The cat [file name] command shows the contents of a single file, while the cat [file name 1] [file name 2] command displays the contents of both files in the correct order.
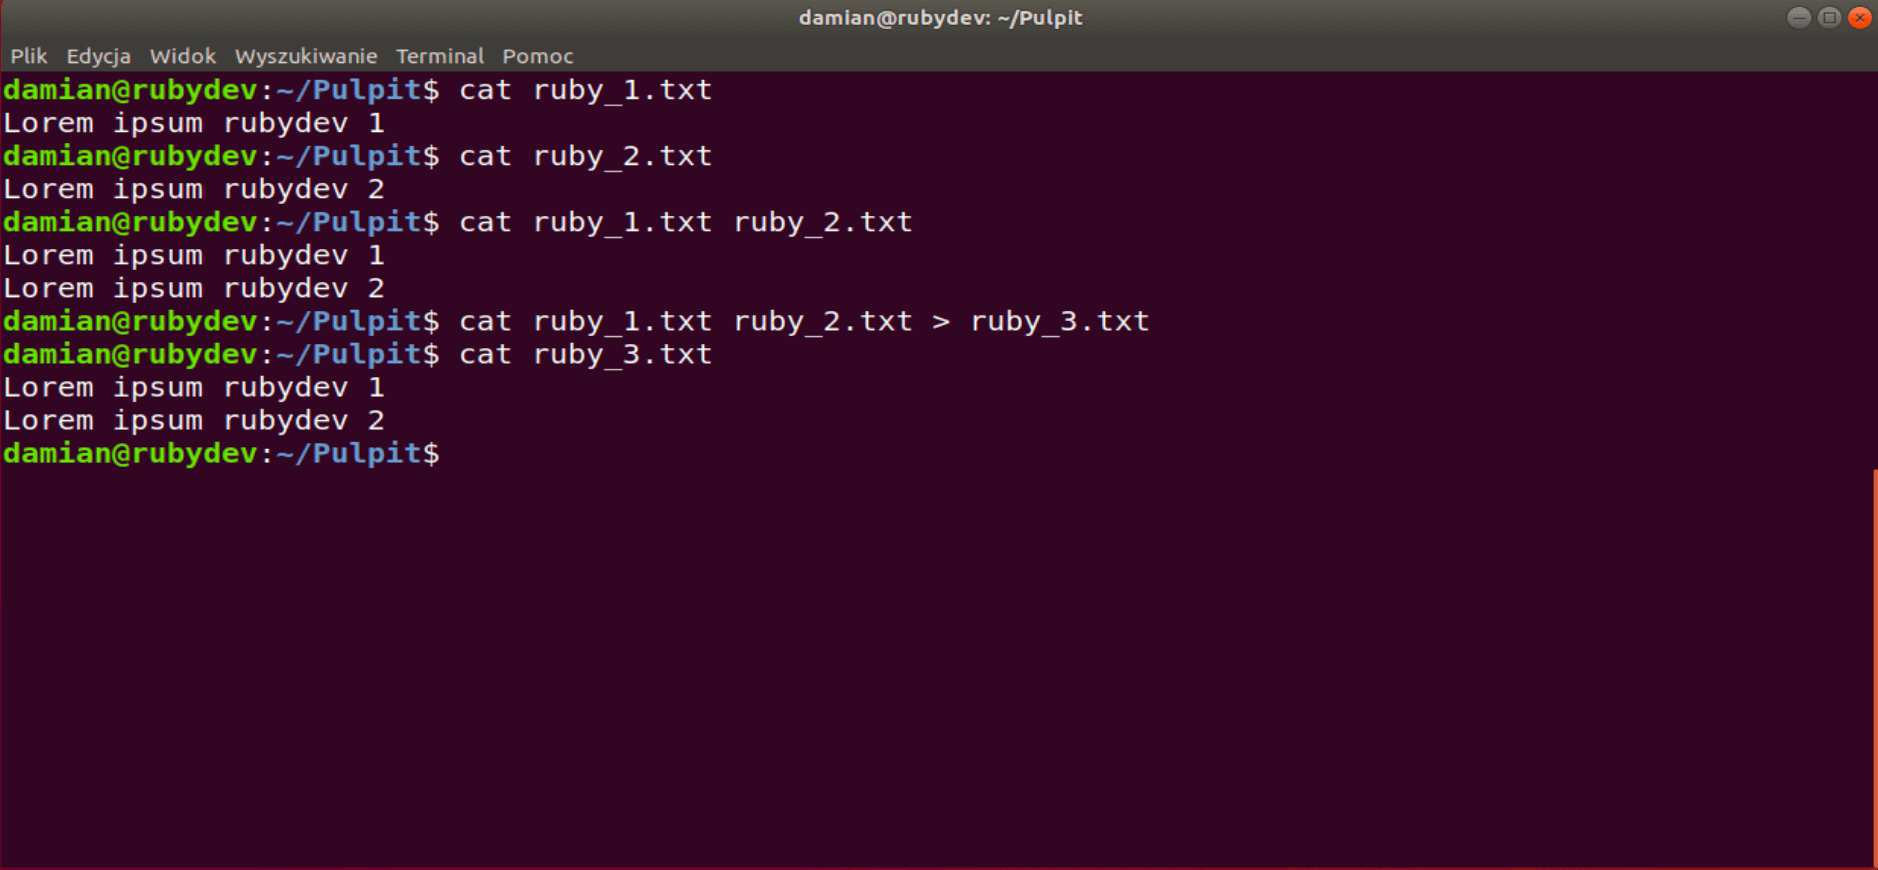
There is one more thing we can do with the cat command – redirect the standard output to a new file using the > sign. This means that the content displayed on the screen will be redirected to a declared file. If the indicated file does not exist in the specified location, it will be created automatically.
What do we have here?
ps (process status) – prints out basic information about processes in the system. This command is comparable to the Windows Task Manager, where you have a list of all running applications and processes. Each application, program or running command becomes a process with its unique identifier, the so-called PID (Process IDentifier).
As you can see, the ps command did not show us much. To check all active processes, we will need to call ps with an aux argument.
Aby zobaczyc wszystkie procesy w systemie, uzywajac skladni BSD:
   ps ax
   ps axu
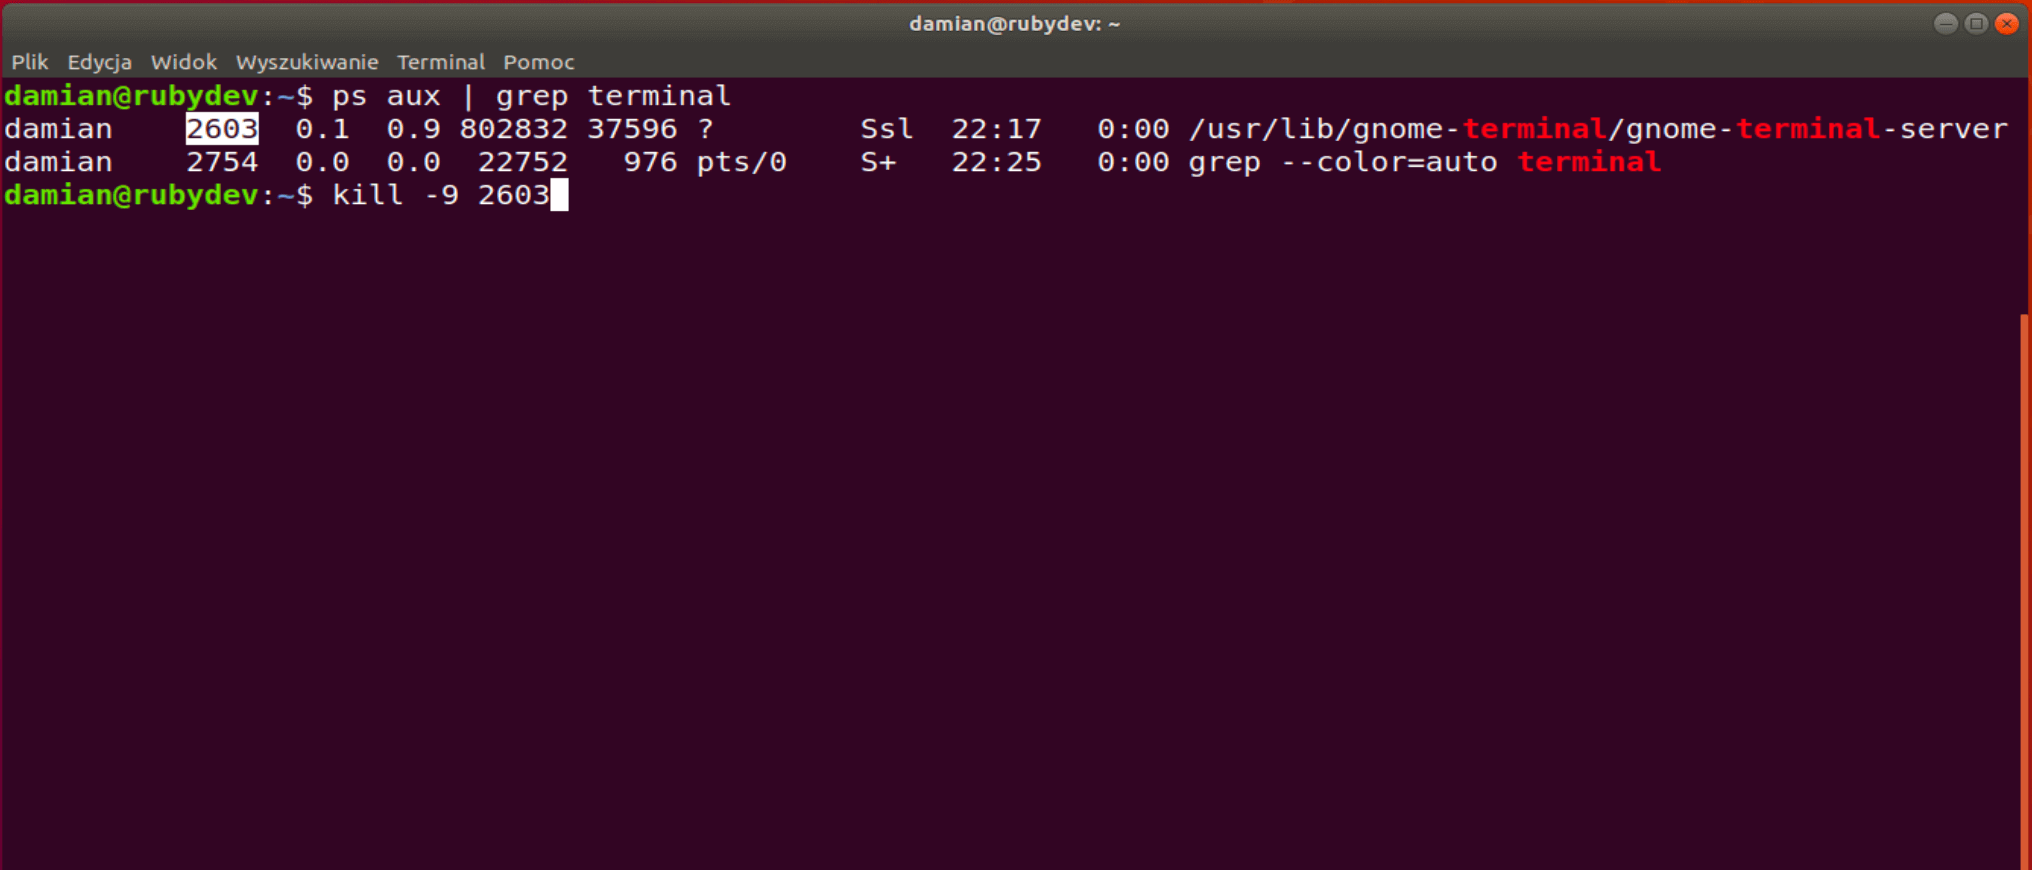
kill – sometimes an application or program stops responding. This is where kill command comes in handy. To kill a process, all you need to do is complete the kill command with its PID.
How do you find the PID of that process? It’s best to use the previously mentioned ps aux command. It may happen that kill alone is not enough because the process is waiting for another dependent process to end. Therefore, kill is also often used with the -9 option. It means the immediate termination of the running process, so before you use this option, make sure that all important changes have been saved. Let’s take a look at an example of such a command:
damian@rubydev:~$ kill -9 1234
Echo!
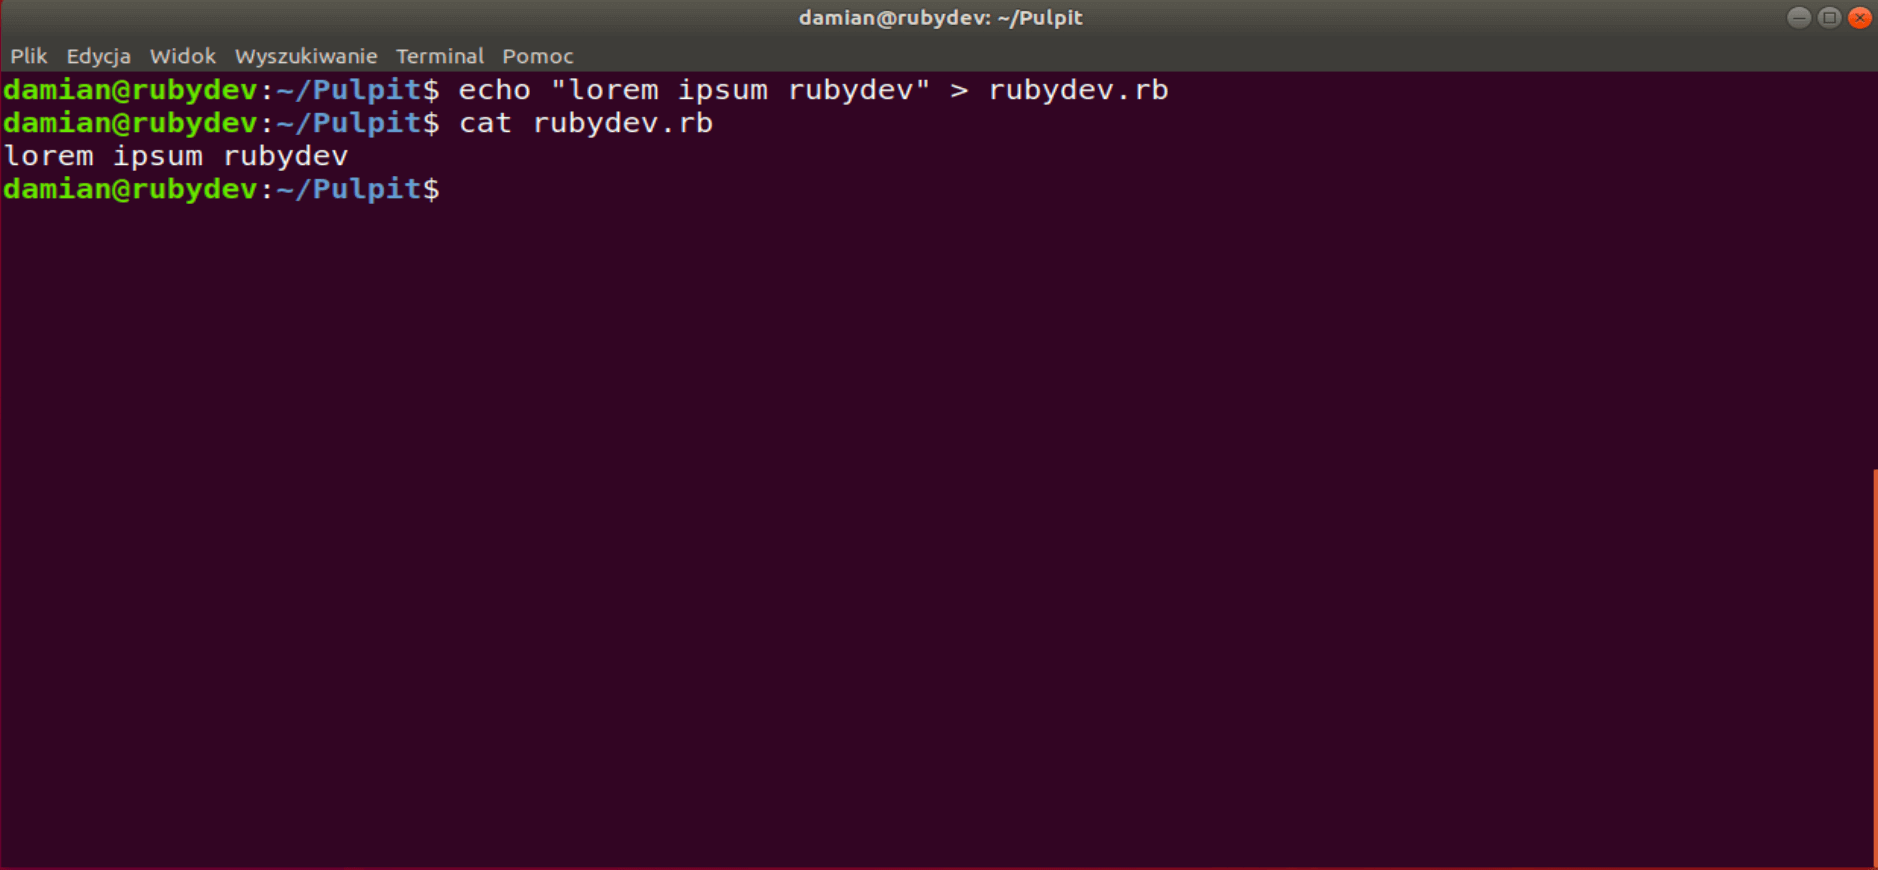
echo – this is the command that returns the text entrusted to it. Similarly to the case of cat, you can direct the entered text to a file with the help of the echo command.
It may be useful
When you want to view the history of the previously entered commands, we can use the history command.
If you want to clear the terminal window, you need the clear command.
The exit command, as the name implies, closes the terminal or the currently open tab.
The beginning and the end
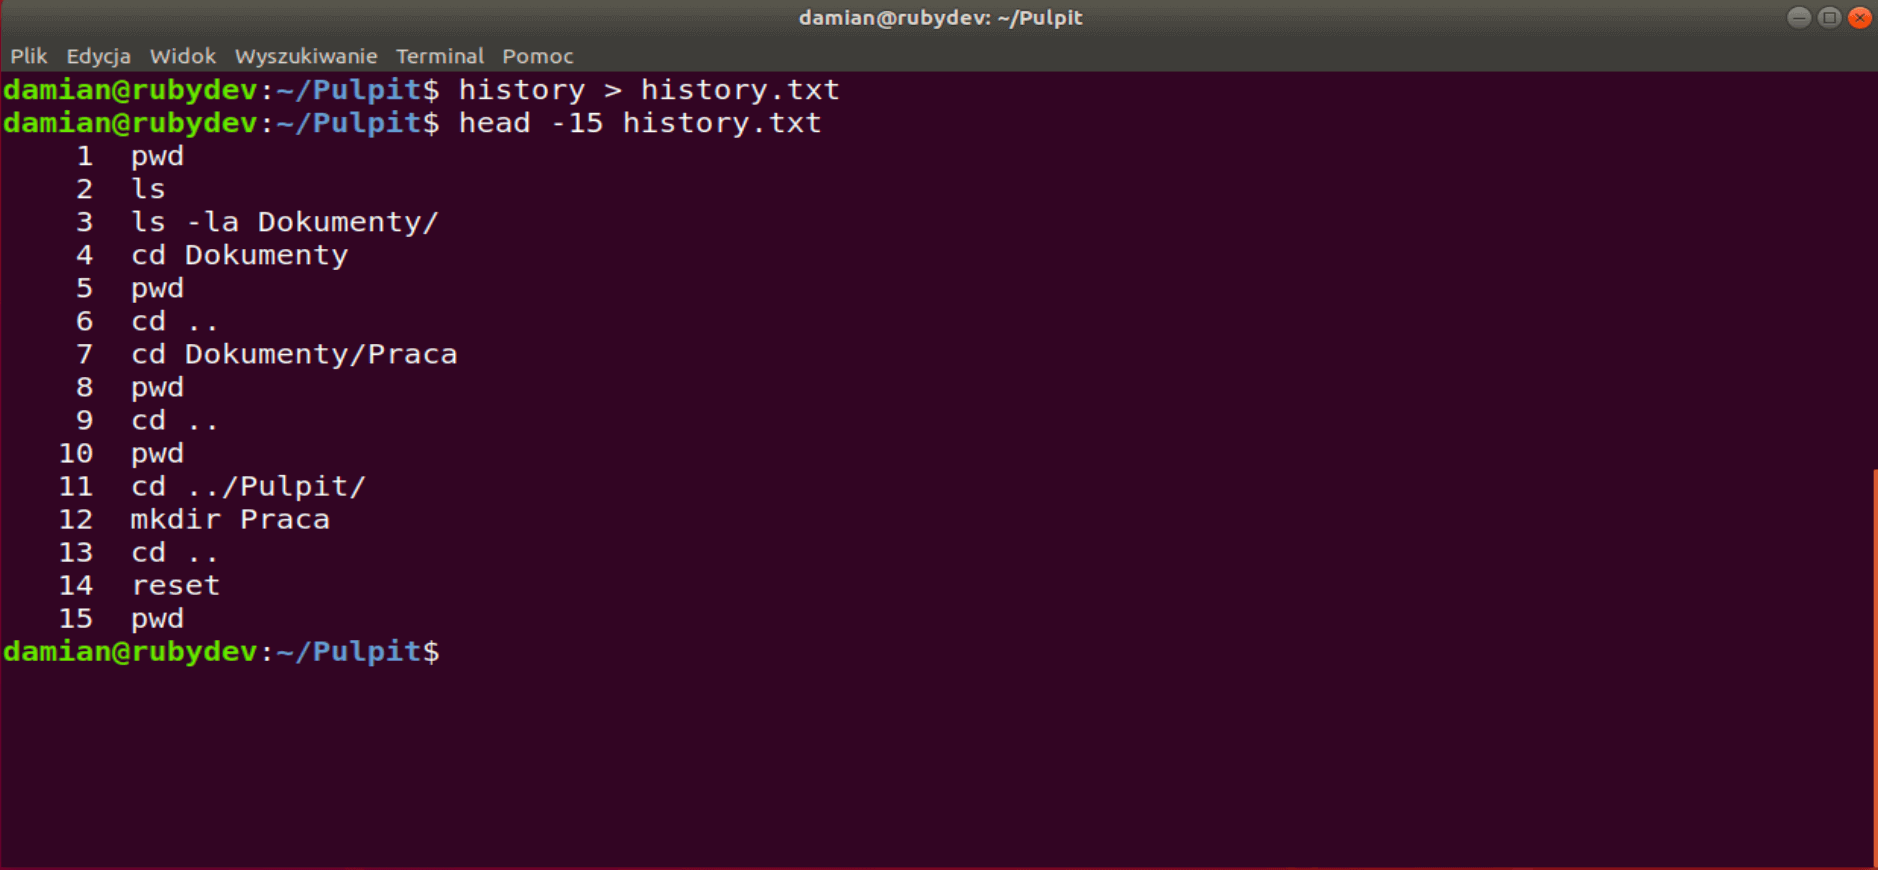
The head command displays the beginning of a file or standard output. The default value is the first ten lines. You can customize it with the -n option where you can put any integer under n. To better illustrate this, I will use an the example.
We will need a text file. Let’s use the already mentioned history command and the redirection > character.
damian@rubydev:~$ history > history.txt
In this way, a file with the entire history of commands was created. Then, using head -15 history.txt, it is possible to display the first fifteen commands entered into the terminal.
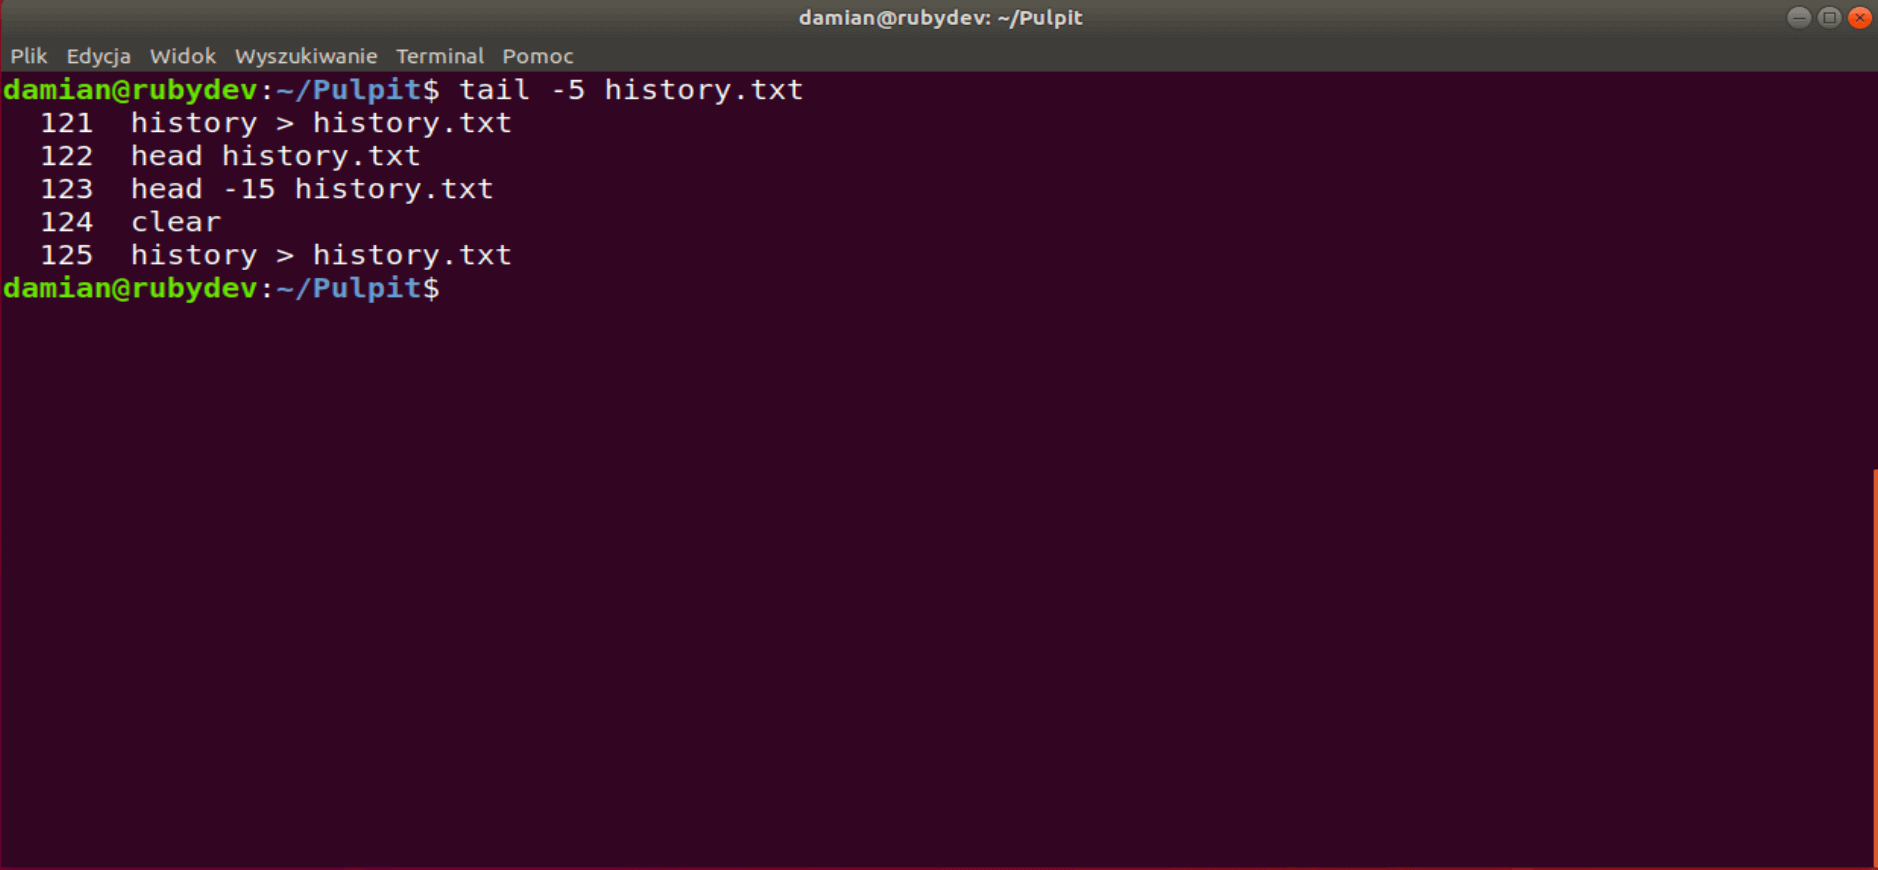
Similarly, the tail command will show us the final lines of the selected file.
Search
grep (global regular expression print) is used to search the text for a string matching the given regular expression (RegExp). It is used very often to find a specific expression in a file or “filter” the returned output. For this purpose, let’s use the previously created history.txt file and check how often the ps command was used so far:
damian@rubydev:~$ grep ps history.txt
   82  echo "Lorem ipsum rubydev 1" > ruby_1.txt
   84  echo "Lorem ipsum rubydev 2" > ruby_2.txt
   92  ps
   93  ps aux
   94  ps --help
   95  man ps
   96  ps -h
   98  ps --help
   99  ps -ejH
  100  ps aux
  101  man ps
  102  ps -aux
  103  ps aux
  109  history | grep ps
  113  echo "lorem ipsum rubydev" > rubydev.rb
As you can see, grep also found words that contain the phrase ps. The expression used in our example was ps only. I plan to write a separate article on regular expressions, but for now I encourage you to explore the topic on your own. Basic knowledge is just enough at the moment.
Combining commands
| (pipe) is a symbol which allows us to combine several commands (processes) and launch them at the same time. Specifically, we can combine the output (stdout) of one command with the input (stdin) of the other. It is a very useful feature.
The output (stdout) of the history command will be searched by the grep command and return all the strings with the matching ps expression.
history | tail -5
In this case, using the tail command with the -5 option will display the last five lines of the output (stdout) of the history command.
This combination is especially useful when looking for the PID of the process that you want to terminate. Remember that running the grep command will also create a process, so you will usually see the PID of the grep process in the last line.
Accessing files and directories
Before we get to the command changing the type of access permits, it is worth mentioning that each operating system has the so-called access rights. This means that each directory or file contains metadata about who has access to it. The first column of the following “output” tells us all about it (output information displayed in the terminal window):
history | tail -5
Access to files and directories is defined by three components. The first one (user) means a single user, the second one (group) means a group, while the third one (other) applies to all other users.
d – determines whether it is a directory or a file (d – directory, f – file)
rwx – user rights
r-x – permissions for the group
r-x – authorized for all other users
To simplify it, you can divide it into three parts:
Let us now go to the very meaning of these rights:
r (read) – allows you to read the content
w (write) – allows you to modify the content
x (execute) – allows you to execute a file or open a directory
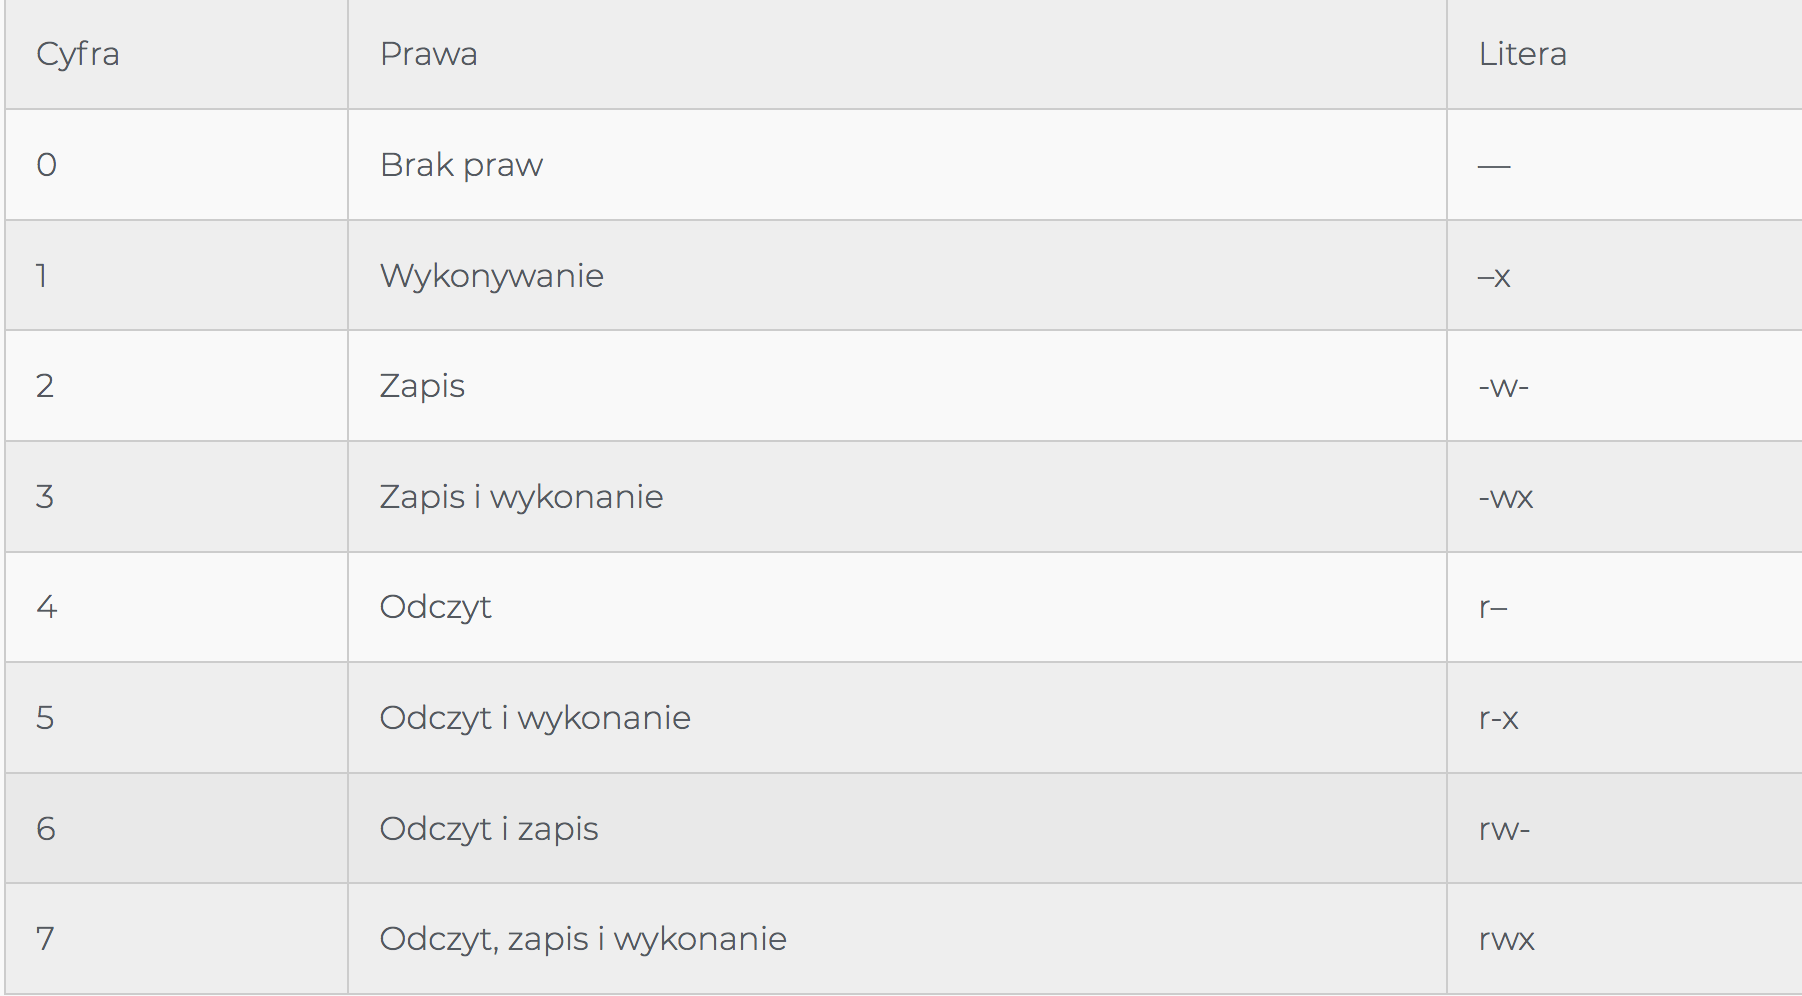
File or directory permissions can be changed using the chmod (change mode) command. The easiest way to change the permissions is to use the embedded system and provide the number for the permission for the user, group and others.
To put this knowledge into practice, let’s change the permissions for the previously listed wideo directory for groups and other users – take away all permissions for those two, but leave the full permit just for the single user. According to the table above, “no rights” is denoted by the number 0. Immediately after the chmod command, you have to insert three digits, each one specifying the rights for the given category (user – group – others). At the end, give the name of the file or directory. The command should look like this:
damian@rubydev:~$ chmod 700 Wideo
damian@rubydev:~$ ls -l | tail -1
drwx------ 2 damian damian 4096 sty 6 17:41 Wideo
Summary
There is a whole swarm of other commands and the easiest way to master all of them is to practice solving specific problems. If you want to learn more about them, I recommend the pocket Linux lexicon of commands. In my opinion, it’s a pleasant way to kill some time while in public transport.