PHP 8.2: Wat is er nieuw?
De nieuwe versie van PHP staat voor de deur. Wat zijn de nieuwe implementaties waar je vanaf moet weten? Lees dit artikel om erachter te komen!
 KEREN TERUG
Lees het eerste deel van onze PHP serie gewijd aan microservices communicatie in Symfony framework en de meest populaire manier - AMQP communicatie met RabbitMQ.
Moderne applicatiearchitectuur heeft ontwikkelaars gedwongen om anders te denken over de communicatie tussen verschillende componenten van IT-systemen. Ooit was de zaak eenvoudiger - de meeste systemen werden gemaakt als monolithische structuren die met elkaar verbonden waren door een netwerk van bedrijfslogicaverbindingen. Het onderhouden van dergelijke afhankelijkheden in een PHP project was een enorme uitdaging voor PHP ontwikkelaarsen de groeiende populariteit van SaaS-oplossingen en de enorme toename in de populariteit van cloud services veroorzaakt dat we tegenwoordig steeds meer horen over microservices en applicatiemodulariteit.
Hoe kunnen we, door onafhankelijke microservices te maken, ervoor zorgen dat ze informatie met elkaar uitwisselen?
Dit artikel is het eerste in een reeks berichten over microservices communicatie in Symfony framework en het behandelt de meest populaire manier - AMQP communicatie met RabbitMQ.
Twee onafhankelijke applicaties maken en communicatie tussen hen realiseren door alleen Message Bus te gebruiken.
We hebben twee denkbeeldige, onafhankelijke toepassingen:
* app1: die e-mail- en sms-berichten naar werknemers stuurt
* app2Hiermee kun je het werk van werknemers beheren en hen taken toewijzen.
We willen een modern en eenvoudig systeem creëren waarbij de toewijzing van werk aan een medewerker in app2 stuurt een melding naar de klant met app1. Ondanks de schijn is dit heel eenvoudig!
Voor dit artikel gebruiken we de nieuwste Symfony (versie 6.1 op het moment van schrijven) en de nieuwste versie van PHP (8.1). In een paar eenvoudige stappen maken we een werkende lokale Docker-omgeving met twee microservices. Alles wat je nodig hebt is:
* een werkende computer,
* Docker + geïnstalleerd Docker Compose-omgeving
* en een lokaal geconfigureerde Symfony CLI en wat vrije tijd.
We zullen de mogelijkheden van Docker gebruiken als een applicatievirtualisatie- en containerisatietool. Laten we beginnen met het maken van een directory tree, een raamwerk voor twee Symfony-applicatiesen beschrijf de infrastructuur van onze omgevingen met behulp van de docker-compose.yml bestand.
 cd ~
 mkdir microservices-in-symfony
 cd microservices-in-symfony
 symfony nieuwe app1
 symfony nieuwe app2
 raak docker-compose.yml aan
We hebben twee mappen gemaakt voor twee afzonderlijke Symfony-applicaties en een lege docker-compose.yml bestand om onze omgeving te starten.
Laten we de volgende secties toevoegen aan de docker-compose.yml file:
versie: "3.8

services:
app1:
containername: app1
bouwen: app1/.
restart: on-failure
envfile: app1/.env
omgeving:
APPNAME: app1
tty: true
stdinopen: true

app2:
gebruikersnaam: app2
bouwen: app2/.
restart: on-failure
envfile: app2/.env
omgeving:
APPNAME: app2
tty: true
stdinopen: waar

rabbitmq:
gebruikersnaam: rabbitmq
beeld: rabbitmq:beheer
poorten:
- 15672:15672
- 5672:5672
omgeving:
- RABBITMQDEFAULTUSER=gebruiker
- RABBITMQDEFAULT_PASS=Wachtwoord
Bron code direct beschikbaar: thecodest-co/microservices-in-symfony/blob/main/docker-compose.yml
Maar wacht, wat gebeurde hier? Voor degenen die niet bekend zijn met Docker lijkt het bovenstaande configuratiebestand misschien raadselachtig, maar het doel is heel eenvoudig. Met behulp van Docker Compose bouwen we drie "services":
Voor een goede werking hebben we nog steeds het volgende nodig Dockerbestand bestanden die de bron zijn om de afbeeldingen te bouwen. Laten we ze dus maken:
 raak app1/Dockerfile aan
 raak app2/Dockerfile aan
Beide bestanden hebben precies dezelfde structuur en zien er als volgt uit:
VAN php:8.1

COPY --from=composer:latest /usr/bin/composer /usr/local/bin/composer
COPY . /app/
WERKDIR /app/

ADD https://github.com/mlocati/docker-php-extension-installer/releases/latest/download/install-php-extensions /usr/local/bin/

RUN chmod +x /usr/local/bin/install-php-extensions && sync &&
install-php-extensions amqp

RUN apt-get update
&& apt-get install -y libzip-dev wget --no-install-recommends
&& apt-get clean
&& rm -rf /var/lib/apt/lists/* /tmp/* /var/tmp/*

RUN docker-php-ext-install zip;

CMD bash -c "cd /app && composer install && php -a"
Broncode direct beschikbaar: /thecodest-co/microservices-in-symfony/blob/main/app1/Dockerfile
Het bovenstaande bestand wordt gebruikt door Docker Compose om een container te bouwen van een PHP 8.1 image met Composer en de AMQP extensie geïnstalleerd. Daarnaast draait het de PHP intepreter in append mode om de container op de achtergrond draaiende te houden.
Je mappen- en bestandsstructuur zou er nu als volgt uit moeten zien:
 .
 ├── app1
 └── Dockerfile
 | # Symfony App Structuur
 ├── app2
 └── Dockerfile
 | # Symfony App Structuur
└── docker-compose.ymlLaten we beginnen met de app1 map en de eerste toepassing.
In ons voorbeeld is het een applicatie die luistert naar berichten uit de wachtrij die worden verzonden door app2 zoals beschreven in de vereisten:
een taak toewijzen aan een werknemer in
app2stuurt een melding naar de client
Laten we beginnen met het toevoegen van de benodigde bibliotheken. AMQP wordt standaard ondersteund voor de symfonie/boodschapper uitbreiding. We zullen bovendien het volgende installeren monoloog/monoloog om systeemlogs bij te houden voor eenvoudigere analyse van het gedrag van applicaties.
 cd app1/
 symfony composer req amqp ampq-messenger monolog
Na de installatie werd een extra bestand toegevoegd onder config/pakketten/boodschapper.yaml. Het is een configuratiebestand voor de Symfony Messenger component en we hebben zijn volledige configuratie.
Vervang het door het onderstaande YAML-bestand:
kader:
messenger:
# Vink dit (en het mislukte transport hieronder) af om mislukte berichten naar dit transport te sturen voor latere afhandeling.
# mislukt_transport: mislukt

    transporten:
        # https://symfony.com/doc/current/messenger.html#transport-configuration
        externe_berichten:
            dsn: '%env(MESSENGER_TRANSPORT_DSN)%'
            opties:
                auto_setup: false
                uitwisseling:
                    naam: berichten
                    type: direct
                    standaard_publiceer_routing_sleutel: van_extern
                wachtrijen:
                    berichten:
                        binding_keys: [from_external]
Broncode direct beschikbaar: thecodest-co/microservices-in-symfony/blob/main/app1/config/packages/messenger.yaml
Symfony Messenger wordt gebruikt voor synchrone en asynchrone communicatie in Symfony-applicaties. Het ondersteunt een verscheidenheid aan vervoertof waarheidsbronnen van de transportlaag. In ons voorbeeld gebruiken we de AMQP extensie die het RabbitMQ event queue systeem ondersteunt.
De bovenstaande configuratie definieert een nieuw transport met de naam externe_berichtendie verwijst naar de BOODSCHAPPER_TRANSPORT_DSN omgevingsvariabele en definieert direct luisteren op de berichten kanaal in Message Bus. Bewerk op dit punt ook de app1/.env bestand en voeg het juiste transportadres toe.
“`env

(…)
MESSENGERTRANSPORTDSN=amqp://user:password@rabbitmq:5672/%2f/messages
(…)
“
After preparing the application framework and configuring the libraries, it is time to implement the business logic. We know that our application must respond to the assignment of a job to a worker. We also know that assigning a job in theapp2system changes the status of the job. So let's create a model that mimics the status change and save it in theapp1/Message/StatusUpdate.php` path: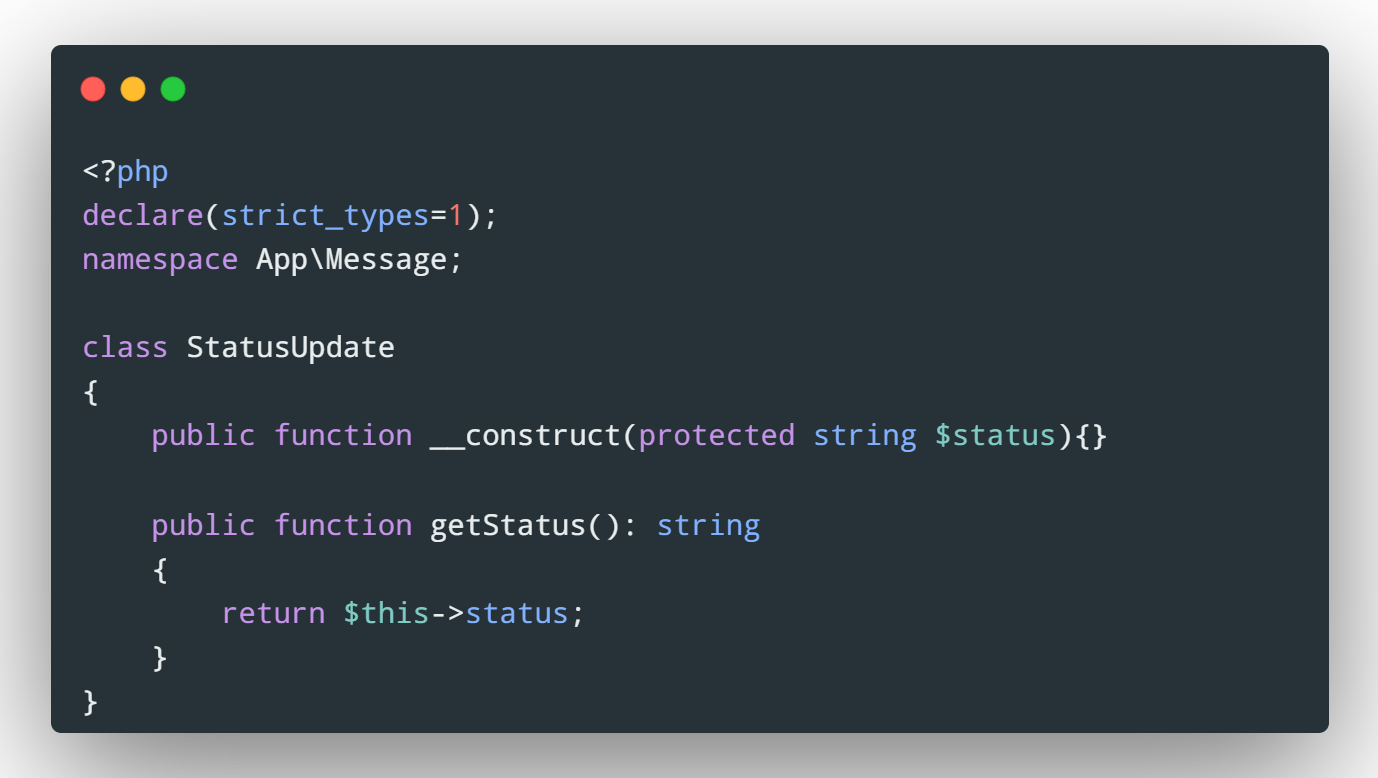
 {
openbare functie __construct(beschermde string $status){}

publieke functie getStatus(): string
{
    return $this->status;
}

}
Broncode direct beschikbaar: /thecodest-co/microservices-in-symfony/blob/main/app1/src/Message/StatusUpdate.php
We hebben nog steeds een klasse nodig die de business logica implementeert wanneer onze microservice de bovenstaande gebeurtenis van de wachtrij ontvangt. Dus laten we een Afhandeling van berichten in de app1/Handler/StatusUpdateHandler.php pad:
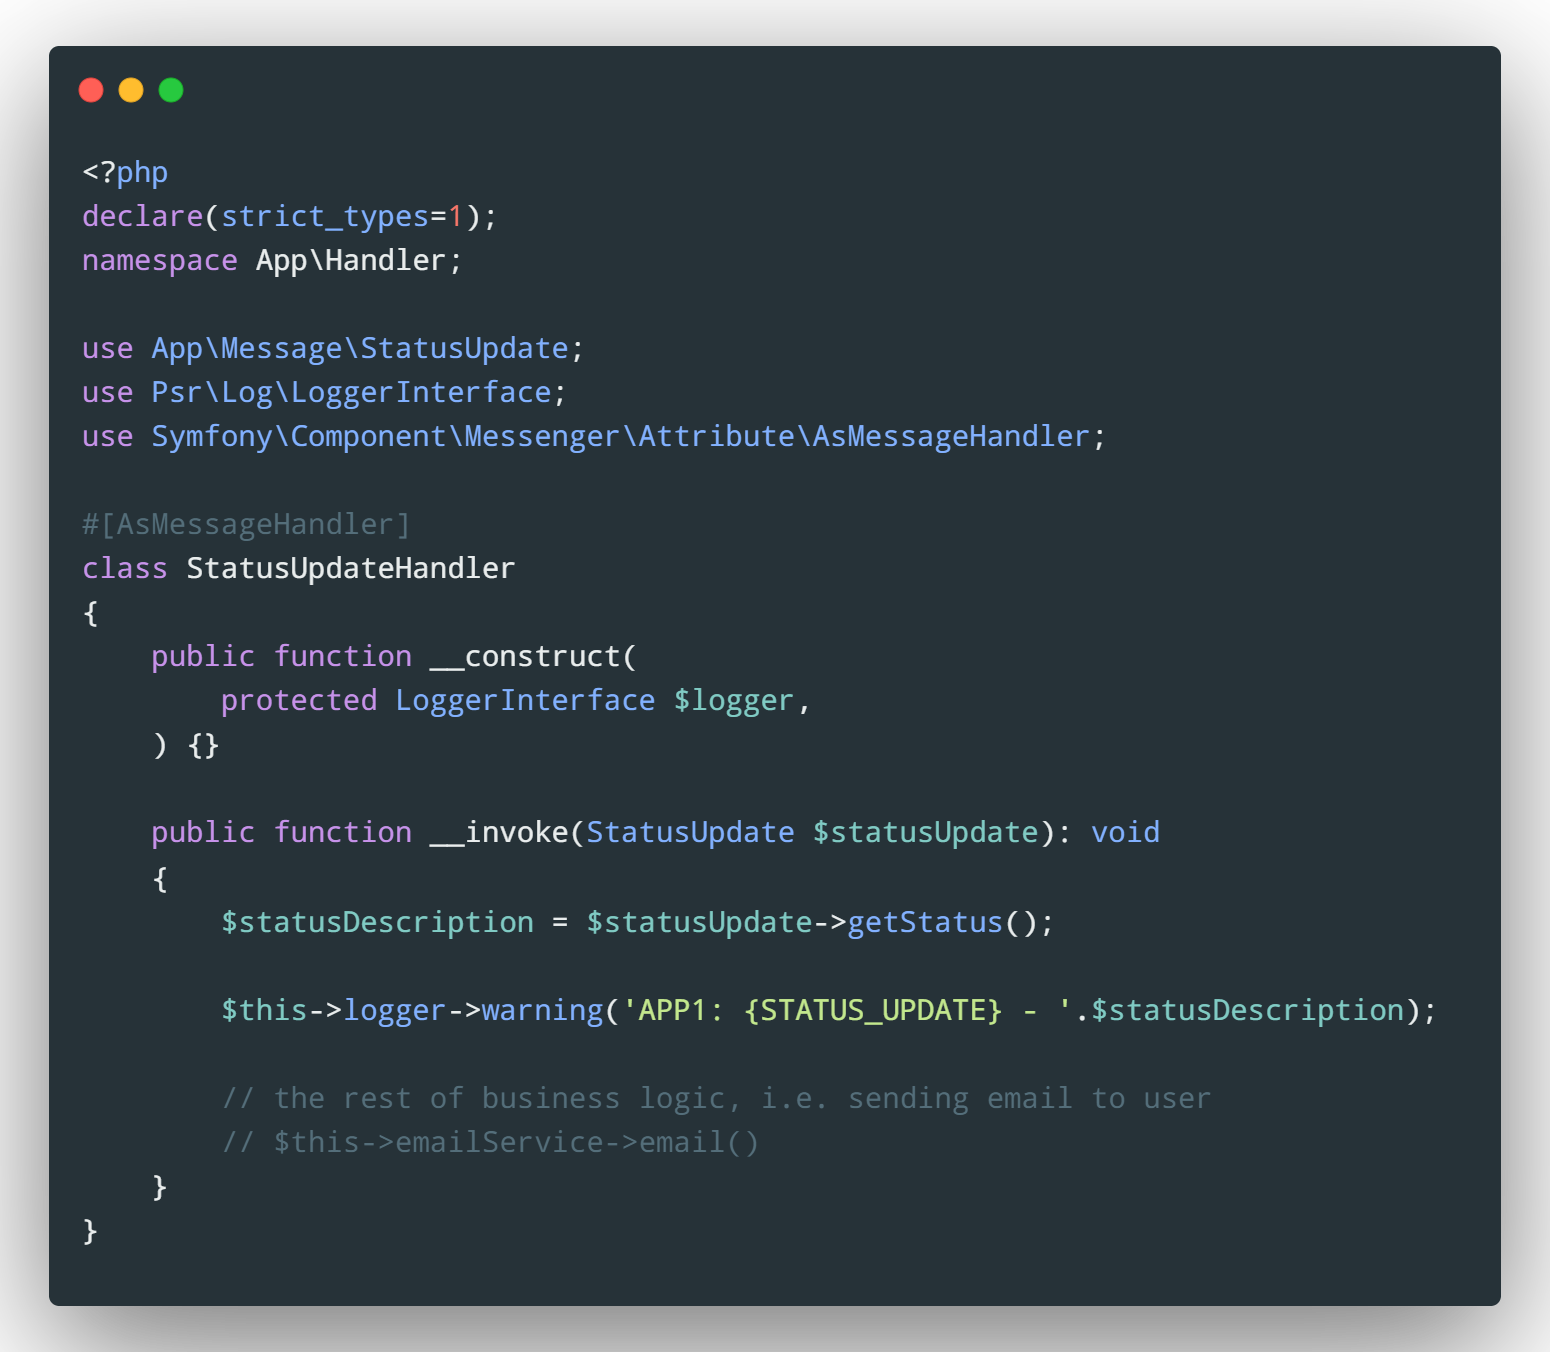
 gebruik PsrLoggerInterface;
use SymfonyComponentMessengerAttributeAsMessageHandler;

[AsMessageHandler]

klasse StatusUpdateHandler
{
openbare functie __construct(
protected LoggerInterface $logger,
) {}

publieke functie __invoke(StatusUpdate $statusUpdate): leeg
{
    $statusDescription = $statusUpdate->getStatus();

    $this->logger->waarschuwing('APP1: {STATUS_UPDATE} - '.$statusDescription);

    // de rest van de bedrijfslogica, d.w.z. het verzenden van e-mail naar de gebruiker
    // $this->emailService->email()
}

}
Broncode direct beschikbaar: /thecodest-co/microservices-in-symfony/blob/main/app1/src/Handler/StatusUpdateHandler.php
PHP attributen maken dingen veel gemakkelijker en betekenen dat we ons in dit specifieke geval geen zorgen hoeven te maken over autowiring of service declaratie. Onze microservice voor het afhandelen van domeinevents is klaar, het is tijd voor de tweede toepassing.
We bekijken de app2 map en de tweede Symfony-applicatie. Ons idee is om een bericht naar de wachtrij te sturen wanneer een werker een taak krijgt toegewezen in het systeem. Laten we dus snel AMQP configureren en onze tweede microservice laten publiceren Statusupdate gebeurtenissen naar de berichtenbus.
Het installeren van de bibliotheken is precies hetzelfde als voor de eerste toepassing.
 cd ..
 cd app2/
 symfony composer req amqp ampq-messenger monolog
Laten we ervoor zorgen dat de app2/.env bestand een geldige DSN-vermelding voor RabbitMQ bevat:
(...)
 MESSENGER_TRANSPORT_DSN=amqp://user:password@rabbitmq:5672/%2f/messages
 (...)
Het enige dat overblijft is Symfony Messenger configureren in de app2/config/pakketten/messenger.yaml file:
kader:
messenger:
# Vink dit (en het mislukte transport hieronder) af om mislukte berichten naar dit transport te sturen voor latere afhandeling.
# mislukt_transport: mislukt

    transporten:
        # https://symfony.com/doc/current/messenger.html#transport-configuration
        async:
            dsn: '%env(MESSENGER_TRANSPORT_DSN)%'

    routing:
        # Routeer je berichten naar de transporten
        AppMessageStatusUpdate': async
Zoals je kunt zien, wijst de transportdefinitie deze keer direct naar async en definieert routing in de vorm van het verzenden van onze Statusupdate bericht naar de geconfigureerde DSN. Dit is het enige configuratiegebied, alles wat overblijft is het maken van de logica en implementatielaag van de AMQP wachtrij. Hiervoor maken we de twin StatusUpdateHandler en Statusupdate lessen in app2.
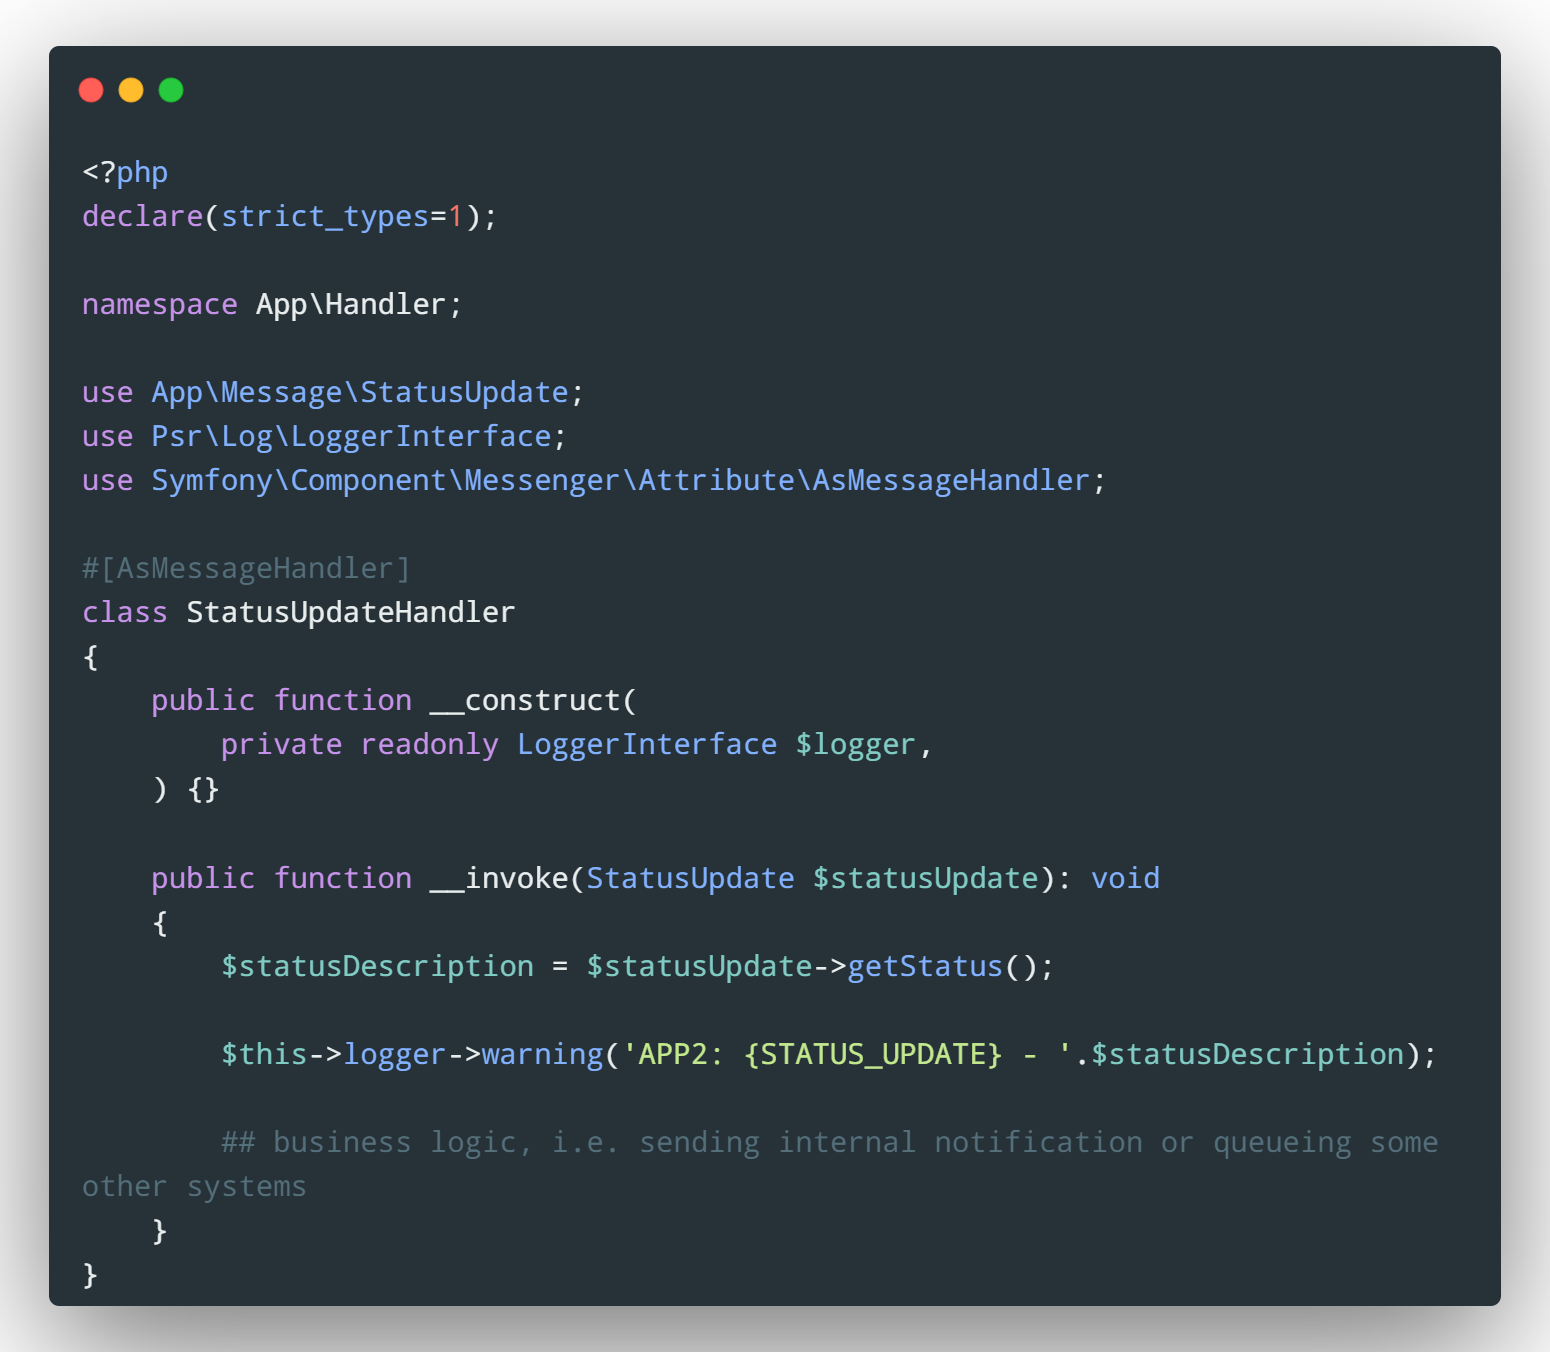
 gebruik PsrLoggerInterface;
use SymfonyComponentMessengerAttributeAsMessageHandler;

[AsMessageHandler]

klasse StatusUpdateHandler
{
openbare functie __construct(
private readonly LoggerInterface $logger,
) {}

publieke functie __invoke(StatusUpdate $statusUpdate): void
{
    $statusDescription = $statusUpdate->getStatus();

    $this->logger->waarschuwing('APP2: {STATUS_UPDATE} - '.$statusDescription);

    ## bedrijfslogica, d.w.z. het verzenden van een interne notificatie of het in een wachtrij plaatsen van andere systemen
}

}
 {
openbare functie __construct(beschermde string $status){}

publieke functie getStatus(): string
{
    return $this->status;
}

}
Broncode direct beschikbaar: /thecodest-co/microservices-in-symfony/blob/main/app2/src/Message/StatusUpdate.php
Tot slot hoeven we alleen nog maar een manier te maken om een bericht naar de Berichtenbus te sturen. We zullen een eenvoudige Symfony-opdracht hiervoor:
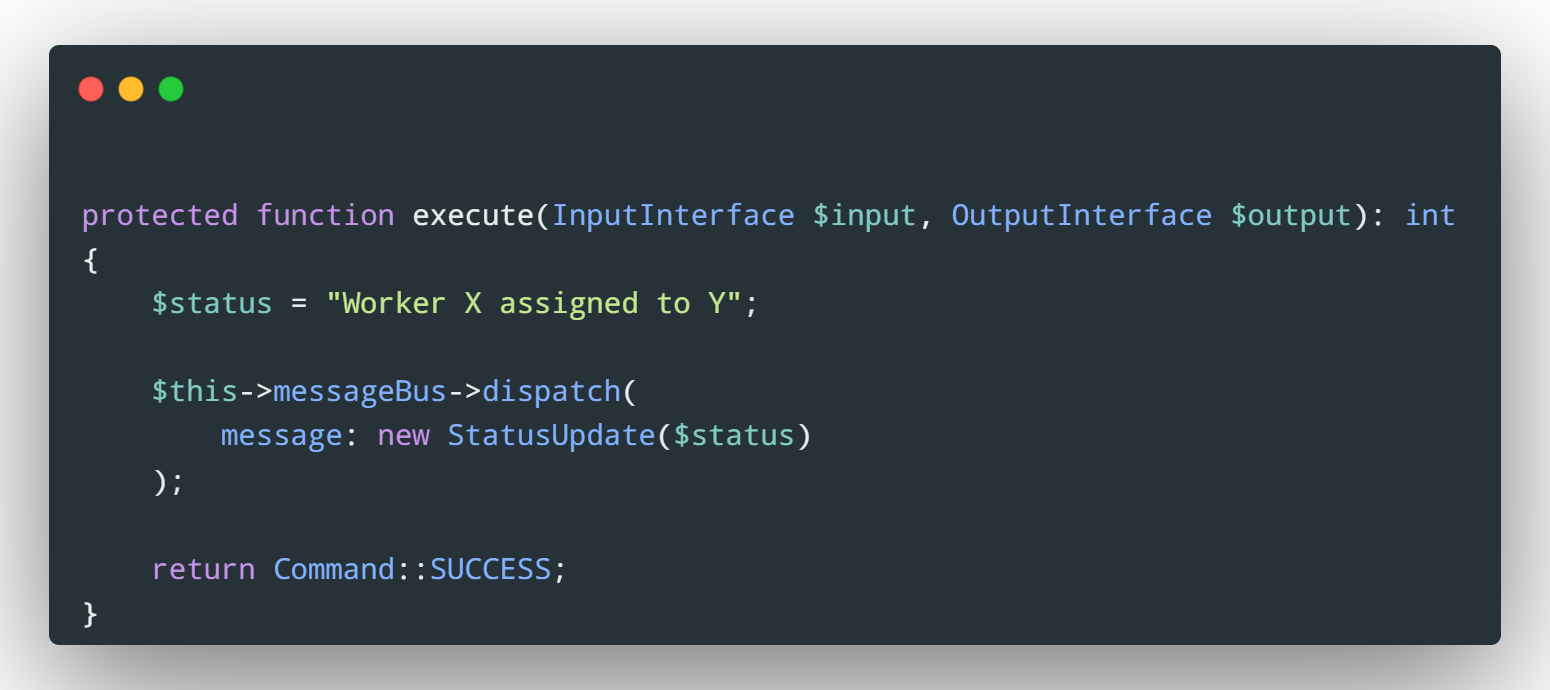
gebruik SymfonyComponentConsoleAttributeAsCommand;
use SymfonyComponentConsoleCommandCommand;
use SymfonyComponentConsoleInputInterface;
use SymfonyComponentConsoleOutputInterface;
use SymfonyComponentMessengerMessageBusInterface;

[AlsCommando(

naam: "app:send"

)]
klasse SendStatusCommand breidt commando uit
{
public function construct(private readonly MessageBusInterface $messageBus, string $name = null)
{
parent::construct($name);
}

protected function execute(InputInterface $input, OutputInterface $output): int
{
    $status = "Werknemer X toegewezen aan Y";

    $this->messageBus->dispatch(
        message: new StatusUpdate($status)
    );

    return Command::SUCCESS;
}

}
Met dank aan Afhankelijkheid injectie kunnen we een instantie van BerichtenBusInterface in onze opdracht en stuur een Statusupdate bericht via de verzenden() methode naar onze wachtrij. Daarnaast gebruiken we hier ook PHP Attributen.
Dat is het - alles wat overblijft is het draaien van onze Docker Compose-omgeving en kijken hoe onze applicaties zich gedragen.
Met Docker Compose worden de containers met onze twee applicaties gebouwd en draaien ze als afzonderlijke instanties, de enige middlewarelaag is de konijnenmq container en onze Message Bus-implementatie.
Laten we vanuit de hoofdmap van het project de volgende commando's uitvoeren:
cd ../ # zorg ervoor dat je in de hoofddirectory bent
 docker-compose up --build -d
Dit commando kan even duren, omdat het twee aparte containers bouwt met PHP 8.1 + AMQP en RabbitMQ image trekt. Wees geduldig. Nadat de images zijn gebouwd, kunt u ons commando starten vanuit app2 en een aantal berichten naar een wachtrij sturen.
docker exec -it app2 php bin/console app:sendJe kunt het zo vaak doen als je wilt. Zolang er geen consument worden je berichten niet verwerkt. Zodra je de app1 en consumeer alle berichten die ze op je scherm laten zien.
docker exec -it app1 php bin/console messenger:consume -vv external_messages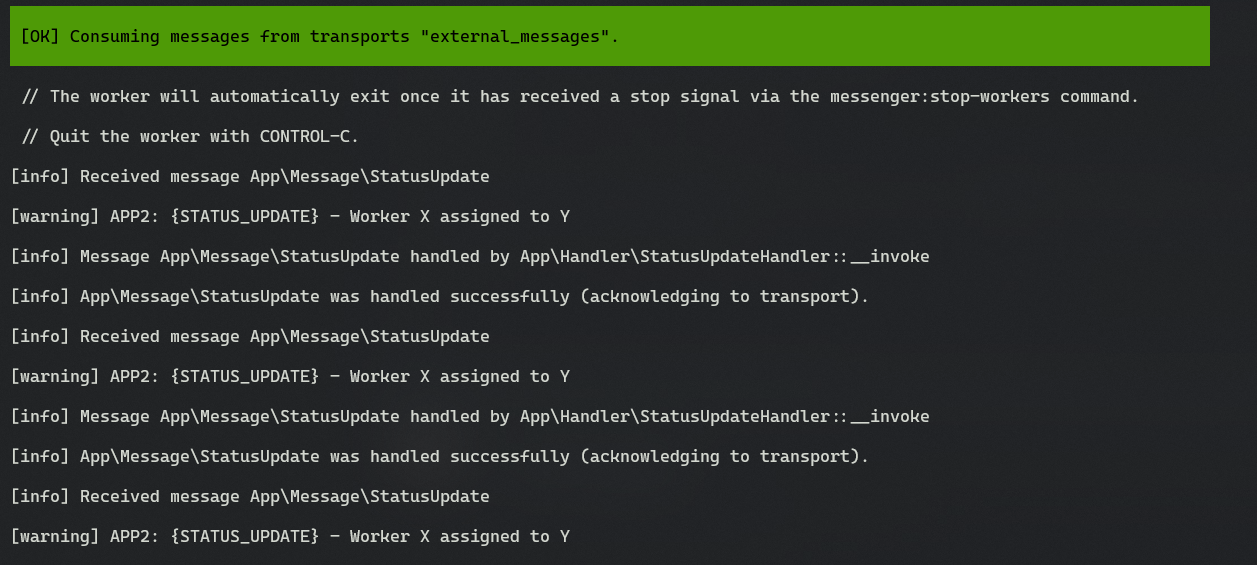
De volledige broncode samen met de README is te vinden in onze openbare repository The Codest Github
Symfony met zijn bibliotheken en tools zorgt voor een snelle en efficiënte benadering van de ontwikkeling van moderne webtoepassingen. Met een paar commando's en een paar regels code kunnen we een modern communicatiesysteem tussen applicaties maken. Symfony, zoals PHPis ideaal voor webapplicaties ontwikkelen en dankzij het ecosysteem en het gemak waarmee het kan worden geïmplementeerd, behaalt dit ecosysteem enkele van de beste time-to-market-indicatoren.
Snel betekent echter niet altijd goed - in het bovenstaande voorbeeld presenteerden we de eenvoudigste en snelste manier van communicatie. Wat de meer onderzoekende zeker zal opvallen is dat er een gebrek is aan het ontkoppelen van domeingebeurtenissen buiten de applicatielaag - in de huidige versie worden ze gedupliceerd, en er is geen volledige ondersteuning voor Enveloponder andere is er geen Postzegels. Voor hen en anderen nodig ik je uit om deel II te lezen, waarin we het onderwerp van het verenigen van de domeinstructuur van Symfony-applicaties in een microservices-omgeving behandelen en de tweede populaire microservices-communicatiemethode bespreken - dit keer synchroon, gebaseerd op de REST API.
