Goals Initial setup Install dependencies Let’s start First, add the tsconfig.json to main directory: Now, let’s create src/server.ts for servers implementations. Then add two functions: one for local server and second for lambda. OK, we don’t have any resolvers or type definitions so we need to create some. Let’s assume that, at first, we want […]
Goals
Configure both local and lambda servers.
Connect both to MongoDB.
Implement basic authentication.
Deploy serverless Apollo GraphQL API with Netlify.
Use Typescript .
Initial setup
npm init -yInstall dependencies
npm install --save typescript graphql aws-lambda @types/aws-lambdaLet’s start
First, add the tsconfig.json to main directory:
 {
 "compilerOptions": {
 "target": "es5",
 "module": "commonjs",
 "allowJs": true,
 "strict": true,
 "esModuleInterop": true,
 "skipLibCheck": true,
 "forceConsistentCasingInFileNames": true
 },
 "include": ["src/*.ts", "src/**/*.ts", "src/**/*.js"],
 "exclude": ["node_modules"]
 }
Now, let’s create src/server.ts for servers implementations. Then add two functions: one for local server and second for lambda.
// src/server.ts
import { ApolloServer as ApolloServerLambda } from "apollo-server-lambda";
import { ApolloServer } from "apollo-server";


const createLambdaServer = () =>
  new ApolloServerLambda({
    typeDefs,
    resolvers,
    introspection: true,
    playground: true,
    },
  });

const createLocalServer = () =>
  new ApolloServer({
    typeDefs,
    resolvers,
    introspection: true,
    playground: true,
    },
  });

export { createLambdaServer, createLocalServer };
OK, we don’t have any resolvers or type definitions so we need to create some. Let’s assume that, at first, we want to create users and receive info about them.
// src/schemas.ts
const { gql } = require("apollo-server-lambda");

const userSchema = gql`
  type User {
    id: ID!
    email: String!
    name: String!
  }

  type Query {
    user(id: ID!): User!
  }

  type Mutation {
    createUser(name: String!, email: String!, password: String!): User!
  }
`;
If you’re not familiar with this, Apollo prepared a very nice tutorial
Now let’s create a user resolver with one query and one mutation.
// src/resolvers.ts
const userResolver = {
  Query: {
    user: async (parent, args, context, info) => {
      {...}
    },
  },
  Mutation: {
    createUser: async (parent, args, context, info) => {
      {...}
    },
  },
};
But we don’t have any data… Let’s fix it 😉
Don’t forget to import type definition and resolver onto the server.
// src/server.ts
import { ApolloServer as ApolloServerLambda } from "apollo-server-lambda";
import { ApolloServer } from "apollo-server";

import { typeDefs } from "./schemas";
import { resolvers } from "./resolvers";

{...}
Connect with MongoDB via mongoose
Now it’s a good time to create a connection with our database. In this particular case, it will be MongoDB. It’s free and easy to maintain. But before that, let’s install two more dependencies:
npm install --save mongoose dotenvThe first step is to create a User Model.
// src/model.ts
import mongoose, { Document, Error, Schema } from "mongoose";

export type User = Document & {
  _id: string,
  email: string,
  name: string,
  password: string,
};

delete mongoose.connection.models["User"];

const UserSchema: Schema = new Schema({
  email: {
    type: String,
    required: true,
    unique: true,
  },
  name: {
    type: String,
    required: true,
    minLength: 3,
    maxLength: 32,
  },
  password: {
    type: String,
    required: true,
  },
});

export const userModel = mongoose.model < User > ("User", UserSchema);
Make passwords more safe
Security first! Let’s now secure our passwords by hashing them.
npm install --save bcrypt @types/bcryptNow, implement the password security inside the pre-middleware callback. Pre-middleware functions are executed one after another, when each middleware calls next. To make the passwords safe, we are using a technique which generates a salt and hash on separate function calls.
// src/model.ts
import bcrypt from "bcrypt";
{...}
const SALT_WORK_FACTOR: number = 10;

UserSchema.pre("save", function (next) {
  const user = this as User;
  if (!this.isModified("password")) return next();

  bcrypt.genSalt(SALT_WORK_FACTOR, function (err, salt) {
    if (err) return next(err);

    bcrypt.hash(user.password, salt, function (err, hash) {
      if (err) return next(err);
      user.password = hash;
      next();
    });
  });
});
{...}
Then add comparePasswords method to UserSchema:
// src/model.ts
{...}
UserSchema.methods.comparePasswords = function (
  candidatePassword: string,
  cb: (err: Error | null, same: boolean | null) => void
) {
  const user = this as User;
  bcrypt.compare(candidatePassword, user.password, (err, isMatch) => {
    if (err) {
      return cb(err, null);
    }
    cb(null, isMatch);
  });
};
{...}
And of course, modify User type.
type comparePasswordFunction = (
  candidatePassword: string,
  cb: (err: Error, isMatch: boolean) => void
) => void;

export type User = Document & {
  _id: string,
  email: string,
  name: string,
  password: string,
  comparePasswords: comparePasswordFunction,
};
Now we can arrange a connection between servers and databases. MONGODB_URI is an environment variable which contains a connection string needed to create the connection. You can get it from your cluster panel after you log into your MongoDB atlas account. Put it inside .env
// .env
MONGODB_URI = ...;
Always remember to add that file to .gitignore. Great! Now let’s add a function which allow to connect with db.
// src/server.ts
import mongoose, { Connection } from "mongoose";
{...}
let cachedDb: Connection;

const connectToDatabase = async () => {
  if (cachedDb) return;

  await mongoose.connect(process.env.MONGODB_URI || "", {
    useNewUrlParser: true,
    useUnifiedTopology: true,
    useFindAndModify: false,
    useCreateIndex: true,
  });
  cachedDb = mongoose.connection;
};
{...}
The context is an object which is shared across all resolvers. To provide it, we just need to add a context initialization function to the ApolloServer constructor. Let’s do it.
// src/server.ts
import { userModel } from "./models/user.model";
{...}
const createLambdaServer = async () =>
  new ApolloServerLambda({
    typeDefs,
    resolvers,
    introspection: true,
    playground: true,
    context: async () => {
      await connectToDatabase();

      return {
        models: {
          userModel,
        },
      };
    },
  });

const createLocalServer = () =>
  new ApolloServer({
    typeDefs,
    resolvers,
    introspection: true,
    playground: true,
    context: async () => {
      await connectToDatabase();

      return {
        models: {
          userModel,
        },
      };
    }
  });
As you can see, we are also passing userModel through context. We can now update resolver:
// resolvers.ts
const userResolver = {
  Query: {
    user: async (_, { email, name, password }, { models: { userModel } }) => {
      const user = await userModel.findById({ _id: id }).exec();
      return user;
    },
  },
  Mutation: {
    createUser: async (_, { id }, { models: { userModel } }) => {
      const user = await userModel.create({ email, name, password });
      return user;
    },
  },
};
Looks nice! Now create a basic server instance:
// src/index.ts
import { createLocalServer } from "./server";
require("dotenv").config();

const port = process.env.PORT || 4000;

const server = createLocalServer();

server.listen(port).then(({ url }) => {
  console.log(`Server ir running at ${url}`);
});
Starting the local server with Nodemon
Last thing before run, add nodemon.json
{
  "watch": ["src"],
  "ext": ".ts,.js",
  "ignore": [],
  "exec": "ts-node --transpile-only ./src/index.ts"
}
Add script to package.json
"scripts": {
    "start": "nodemon"
  },
And run!
npm startYou should get such info inside terminal:
Server ir running at http://localhost:4000/If yes, open the http://localhost:4000/ inside your browser.
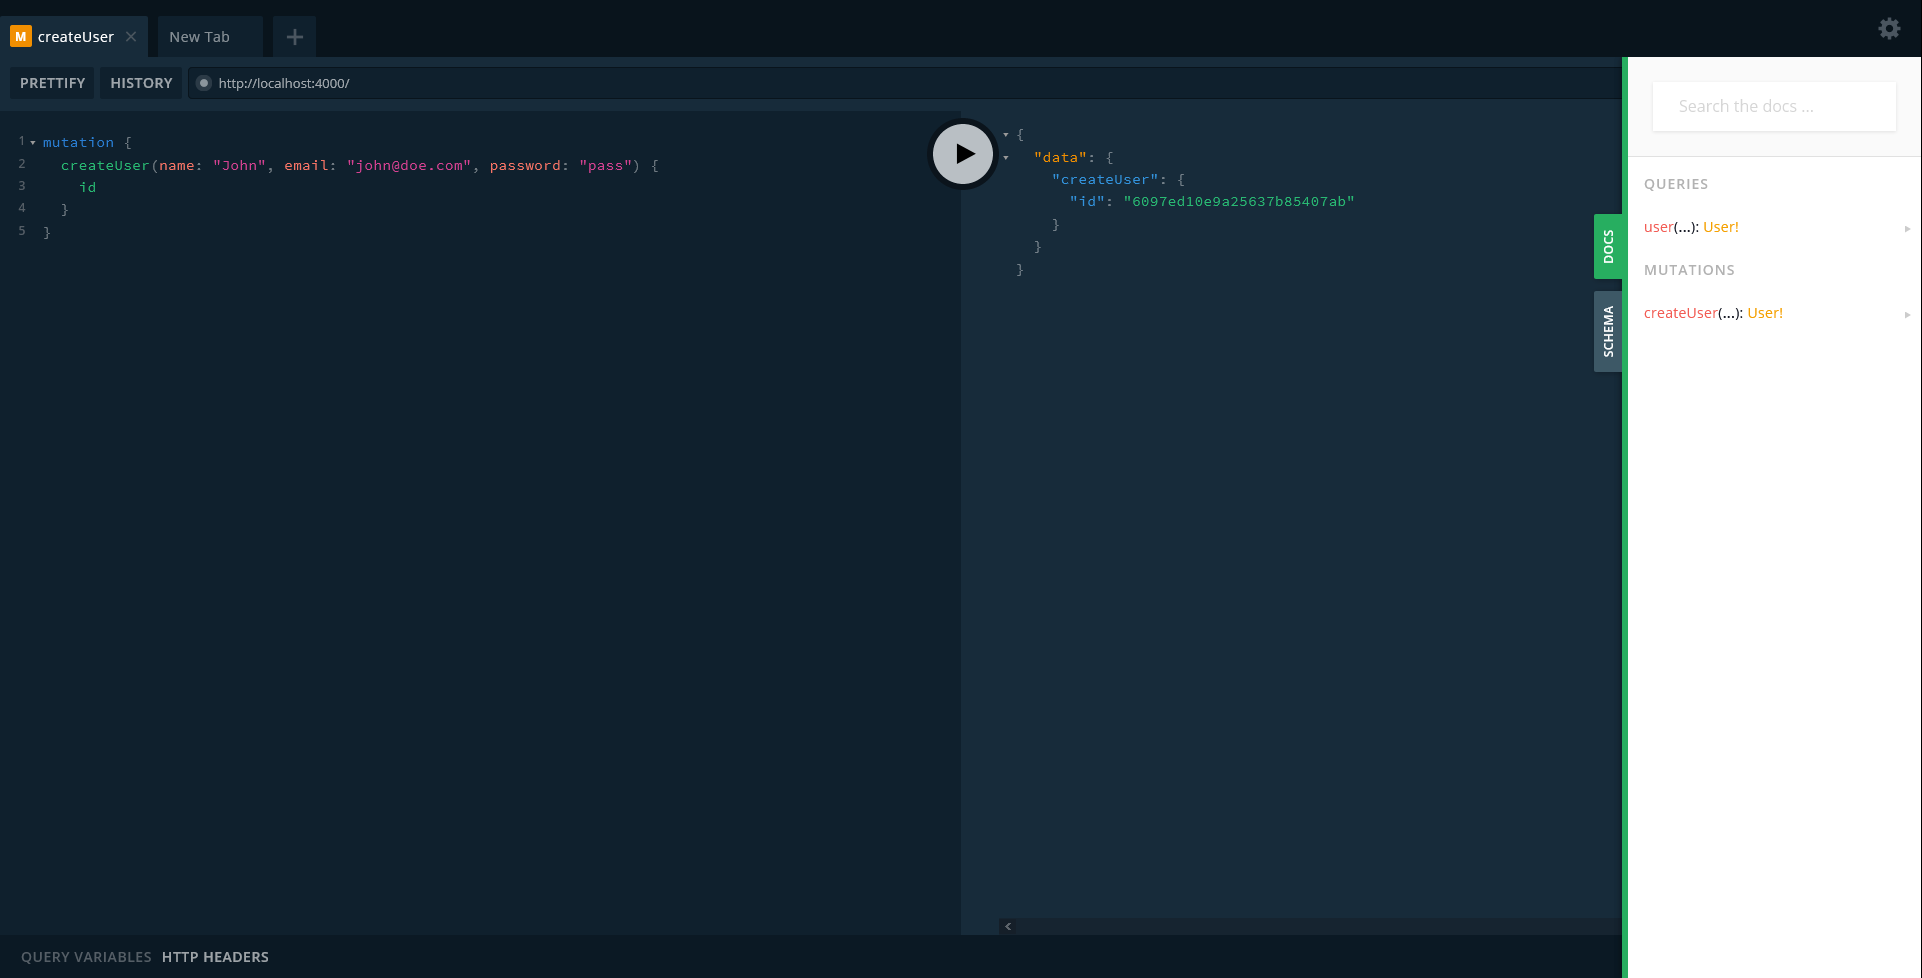
The GraphQL playground should appear. Let’s create a new user!
Take a look at how it looks in the database.
Cool! Everything works fine!
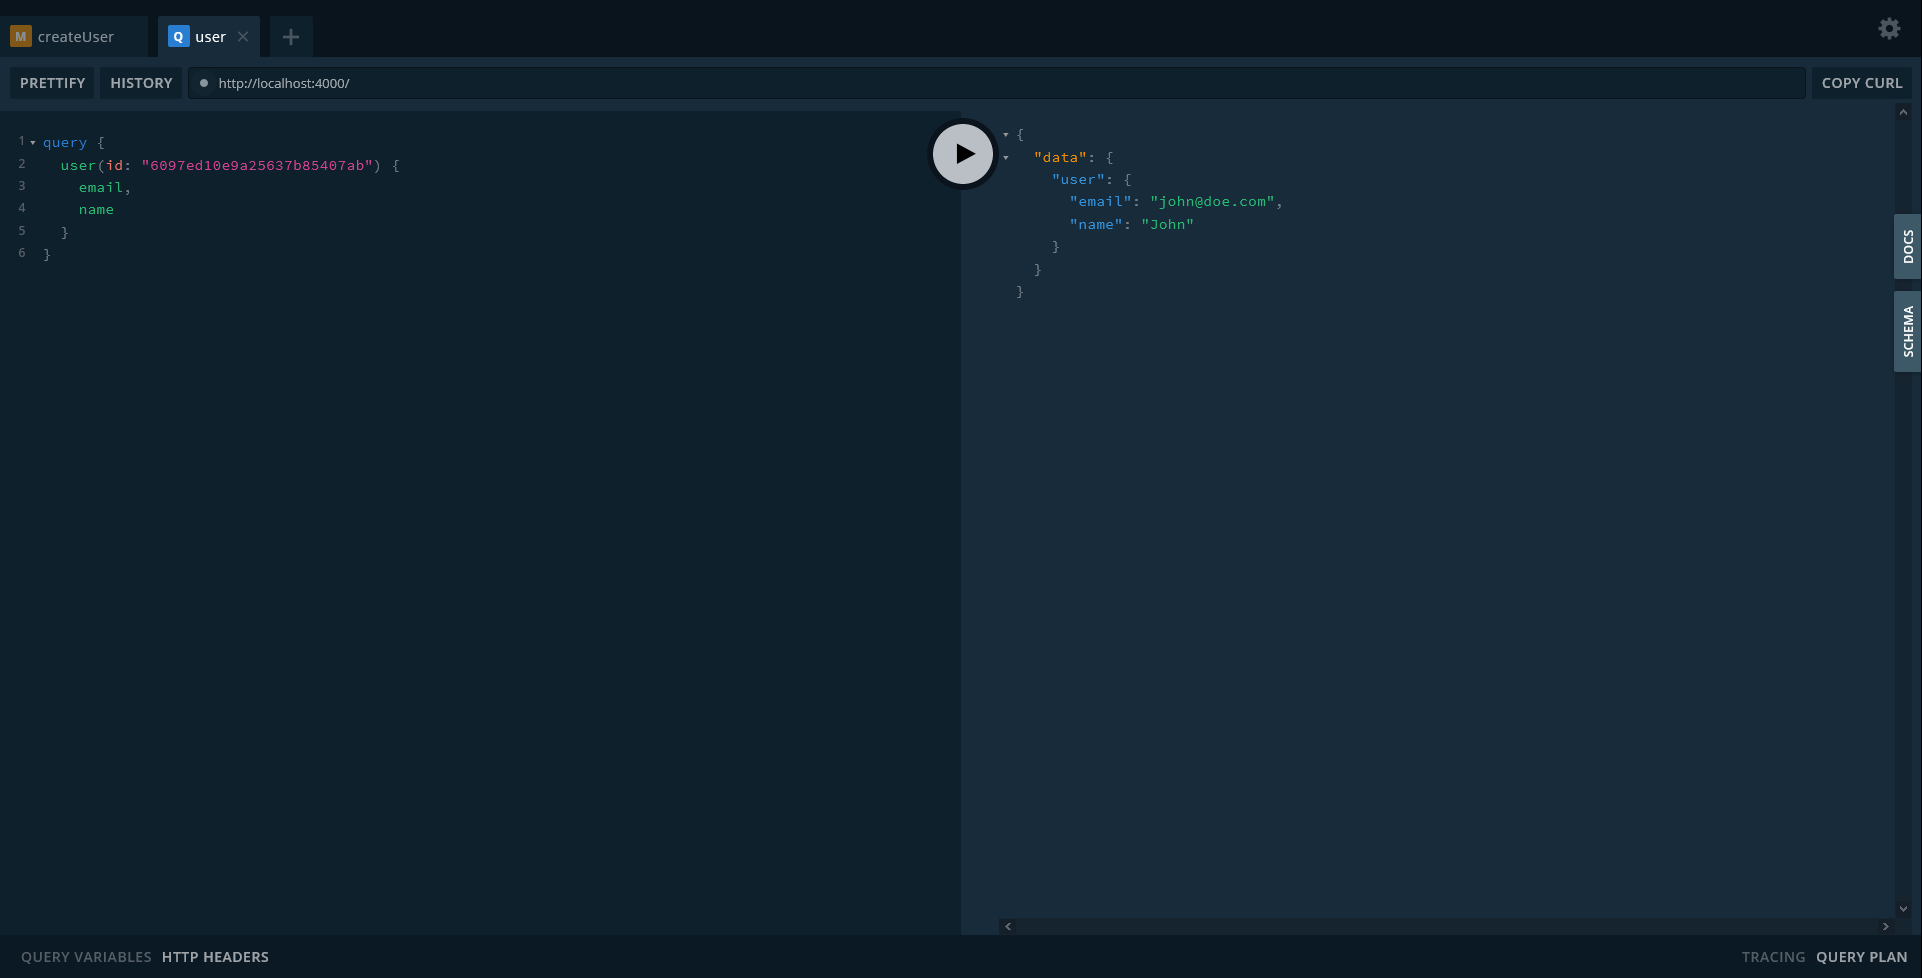
Let’s try and get some user info.
And add the password field…
Nice! We receive error Cannot query field "password" on type "User".". As you can check back, we didn’t add this field inside the user type definition. It is there on purpose. We should not make it possible to query any password or other sensitive data.
Another thing… We can get user data without any authentication… it is not a good solution. We need to fix it.
But before…
Configure Codegen
Let’s use the GraphQL code generator to get a compatible base type, based on our schema.
npm install --save @graphql-codegen/cli @graphql-codegen/introspection
@graphql-codegen/typescript @graphql-codegen/typescript-resolvers
Create codegen.yml
overwrite: true
schema: "http://localhost:4000"
generates:
  ./src/generated/graphql.ts:
    plugins:
      - "typescript"
      - "typescript-resolvers"
  ./graphql.schema.json:
    plugins:
      - "introspection"
Add codegen script to package.json
"scripts": {
    "start": "nodemon",
    "codegen": "graphql-codegen --config ./codegen.yml",
  },
Then, when the local server is running, run script:
npm run codegenIn case of success you will get message:
  √ Parse configuration
  √ Generate outputs
If you receive that info, two files should appear:
graphql.schema.json in the main directorygraphql.ts in newly created path src/generated
We are more interested in the second one. If you open it, you will notice a nice structure of types.
Now we can improve our resolvers:
// src/resolvers.ts
import { Resolvers, Token, User } from "./generated/graphql";

const userResolver: Resolvers = {
  Query: {
    user: async (_, { id }, { models: { userModel }, auth }): Promise<User> => {
      const user = await userModel.findById({ _id: id }).exec();
      return user;
    },
  },
  Mutation: {
    createUser: async (
      _,
      { email, name, password },
      { models: { userModel } }
    ): Promise<User> => {
      const user = await userModel.create({
        email,
        name,
        password,
      });
      return user;
    },
  },
};
Authentication
Next, let’s set up a simple token-based authentication.
npm install --save jsonwebtoken @types/jsonwebtokenCreate checkAuth function to verify if the token is valid. We will add result to the context so that we can access it inside the resolvers.
// src/server.ts
import { IncomingHttpHeaders } from "http";
import {
  APIGatewayProxyEvent,
  APIGatewayProxyEventHeaders,
  Context,
} from "aws-lambda";
import jwt from "jsonwebtoken";
{...}
const checkAuth = async ({ token } : APIGatewayProxyEventHeaders | IncomingHttpHeaders ) => {
  if (typeof token === "string") {
    try {
      return await jwt.verify(token, "riddlemethis");
    } catch (e) {
      throw new AuthenticationError(`Your session expired. Sign in again.`);
    }
  }
};
{...}
const createLambdaServer = async (
  { headers }: APIGatewayProxyEvent,
  context: Context
) => {
  return new ApolloServerLambda({
    typeDefs,
    resolvers,
    context: async () => {
      await connectToDatabase();

      const auth = await checkAuth(headers);

      return {
        auth,
        models: {
          userModel,
        },
      };
    },
  });
};

function createLocalServer() {
  return new ApolloServer({
    typeDefs,
    resolvers,
    introspection: true,
    playground: true,
    context: async ({ req: { headers } = {} }) => {
      const auth = await checkAuth(headers);
      await connectToDatabase();

      return {
         auth,
         models: {
          userModel,
        },
      };
    },
  });
}
Also, we need a way to create such a token. The best way is to implement a login query inside our resolver.
// resolvers.ts
import { Resolvers, Token, User } from "./generated/graphql";

const userResolver: Resolvers = {
  Query: {
    user: async (_, { id }, { models: { userModel }, auth }): Promise<User> => {
      if (!auth) throw new AuthenticationError("You are not authenticated");

      const user = await userModel.findById({ _id: id }).exec();
      return user;
    },
    login: async (
      _,
      { email, password },
      { models: { userModel } }
    ): Promise<Token> => {
      const user = await userModel.findOne({ email }).exec();

      if (!user) throw new AuthenticationError("Invalid credentials");

      const matchPasswords = bcrypt.compareSync(password, user.password);

      if (!matchPasswords) throw new AuthenticationError("Invalid credentials");

      const token = jwt.sign({ id: user.id }, "riddlemethis", {
        expiresIn: 60,
      });

      return { token };
    },
  },
  Mutation: {
    createUser: async (
      _,
      { email, name, password },
      { models: { userModel } }
    ): Promise<User> => {
      const user = await userModel.create({
        email,
        name,
        password,
      });
      return user;
    },
  },
};
You need also to update user type definitions by Token type and login query.
type Token {
    token: String!
  }

type Query {
    user(id: ID!): User!
    login(email: String!, password: String!): Token!
  }
Let’s now try to get user without token
OK, works fine! Try to log in
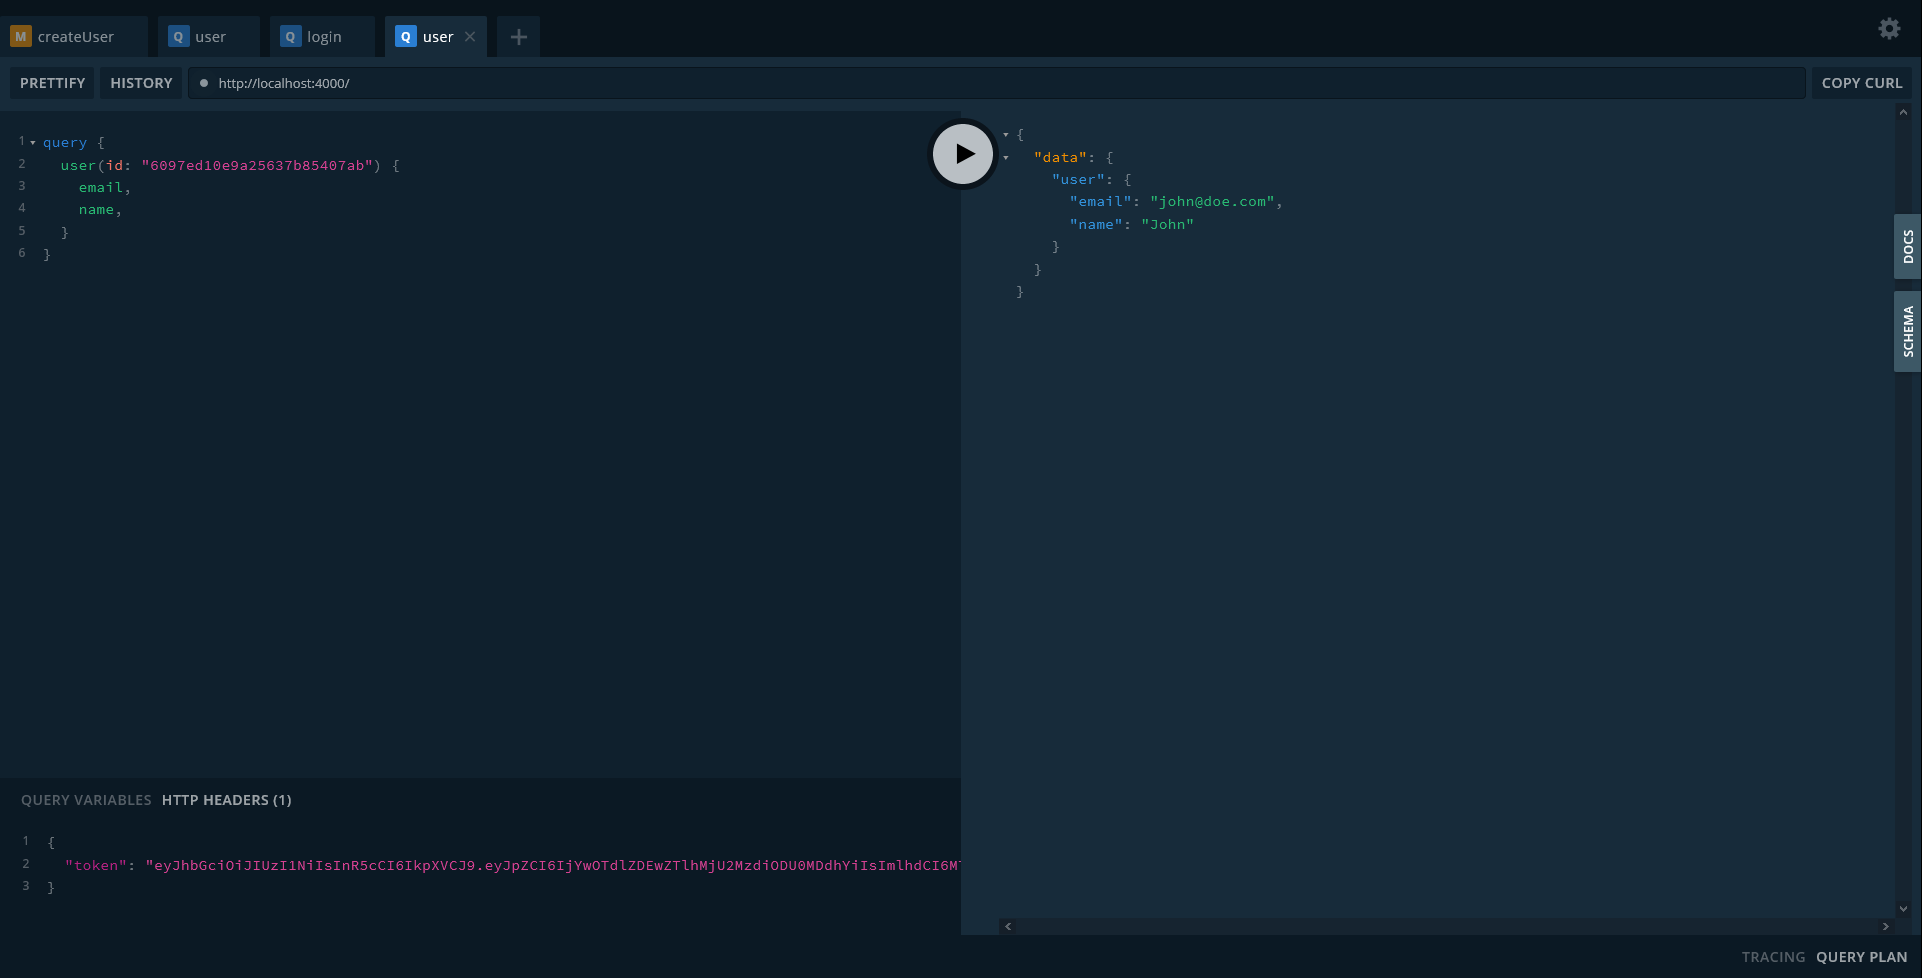
Let’s try again to get user, but this time with token added to headers
Cool! And what if we set wrong credentials?
Nice!
Prepare to Deploy
Last step: deploy serverless api with Netlify!
Create folder lambda in main dir and put two files inside:
First contains AWS handler. It create a ApolloServerLambda server instance and
// lambda/graphql.ts
import { APIGatewayProxyEvent, Context } from "aws-lambda";
import { createLambdaServer } from "???";

export const handler = async (
  event: APIGatewayProxyEvent,
  context: Context
) => {
  const server = await createLambdaServer(event, context);

  return new Promise((res, rej) => {
    const cb = (err: Error, args: any) => (err ? rej(err) : res(args));
    server.createHandler()(event, context, cb);
  });
};
You can read more about it.
Second one, is the tsconfig. Important part is the outDir field.
// lambda/tsconfig.json
{
"compilerOptions": {
"sourceMap": true,
"noImplicitAny": true,
"module": "commonjs",
"target": "es6",
"experimentalDecorators": true,
"allowSyntheticDefaultImports": true,
"moduleResolution": "node ",
"skipLibCheck": true,
"esModuleInterop": true,
"outDir": "./dist"
},
"include": ["./*.ts", "./**/*.ts", "./**/*.js"]
}But there’s a problem. We can’t use /src dir because Netlify can’t reach outside of the lambda folder. So we must bundle it.
npm install --save ncpIt`s a package that allows as to copy directory.
Add bundle script to package.json
"scripts": {
    "bundle": "ncp ./src ./lambda/bundle",
    "codegen": "graphql-codegen --config ./codegen.yml",
    "start": "nodemon",
  },
Now if you run npm run bundle, you san see, that in newly created lambda/bundle dir we have all files from src/.
Update the import path inside lambda/graphql.ts
// lambda/graphql.ts
import { APIGatewayProxyEvent, Context } from "aws-lambda";
import { createLambdaServer } from "./bundle/server";

{...}
You can now add lambda/bundle dir to .gitignore
Deploy with Netlify
We must to tell Netlify what the build command is and where our functions live. To to it let’s create netlify.toml file:
// netlify.toml
[build]
  command = "npm run build:lambda"
  functions = "lambda/dist"
As you can see, it’s same directory as defined as a outDir field in lambda/tsconfig.json
This is how your app structure should look like (well… part of it ;))
app
└───lambda
│ └────bundle
│ │ graphql.ts
│   tsconfig.json.ts
└───src
│ └───generated
│ │    │ graphql.ts
│ │ index.ts
│ │ model.ts
│ │ resolvers.ts
│ │ schemas.ts
│   server.ts
│
│ codegen.yml
│ graphql.schema.json
│ netlify.toml
│ nodemon.json
│ tsconfig.json
Add bundle:lambda script to package.json
"scripts": {
    "build:lambda": "npm run bundle && tsc -p lambda/tsconfig.json",
    "bundle": "ncp ./src ./lambda/bundle",
    "codegen": "graphql-codegen --config ./codegen.yml",
    "start": "nodemon",
  },
Deploy
Let’s try deploying our app via Netlify.
Log to your Netlify account,
Connect with your Github,
Click ‘New site from Git’ button,
Select a proper repo,
Set the build command npm run build:lambda,
Add environment variable (MONGODB_URI),
Deploy…
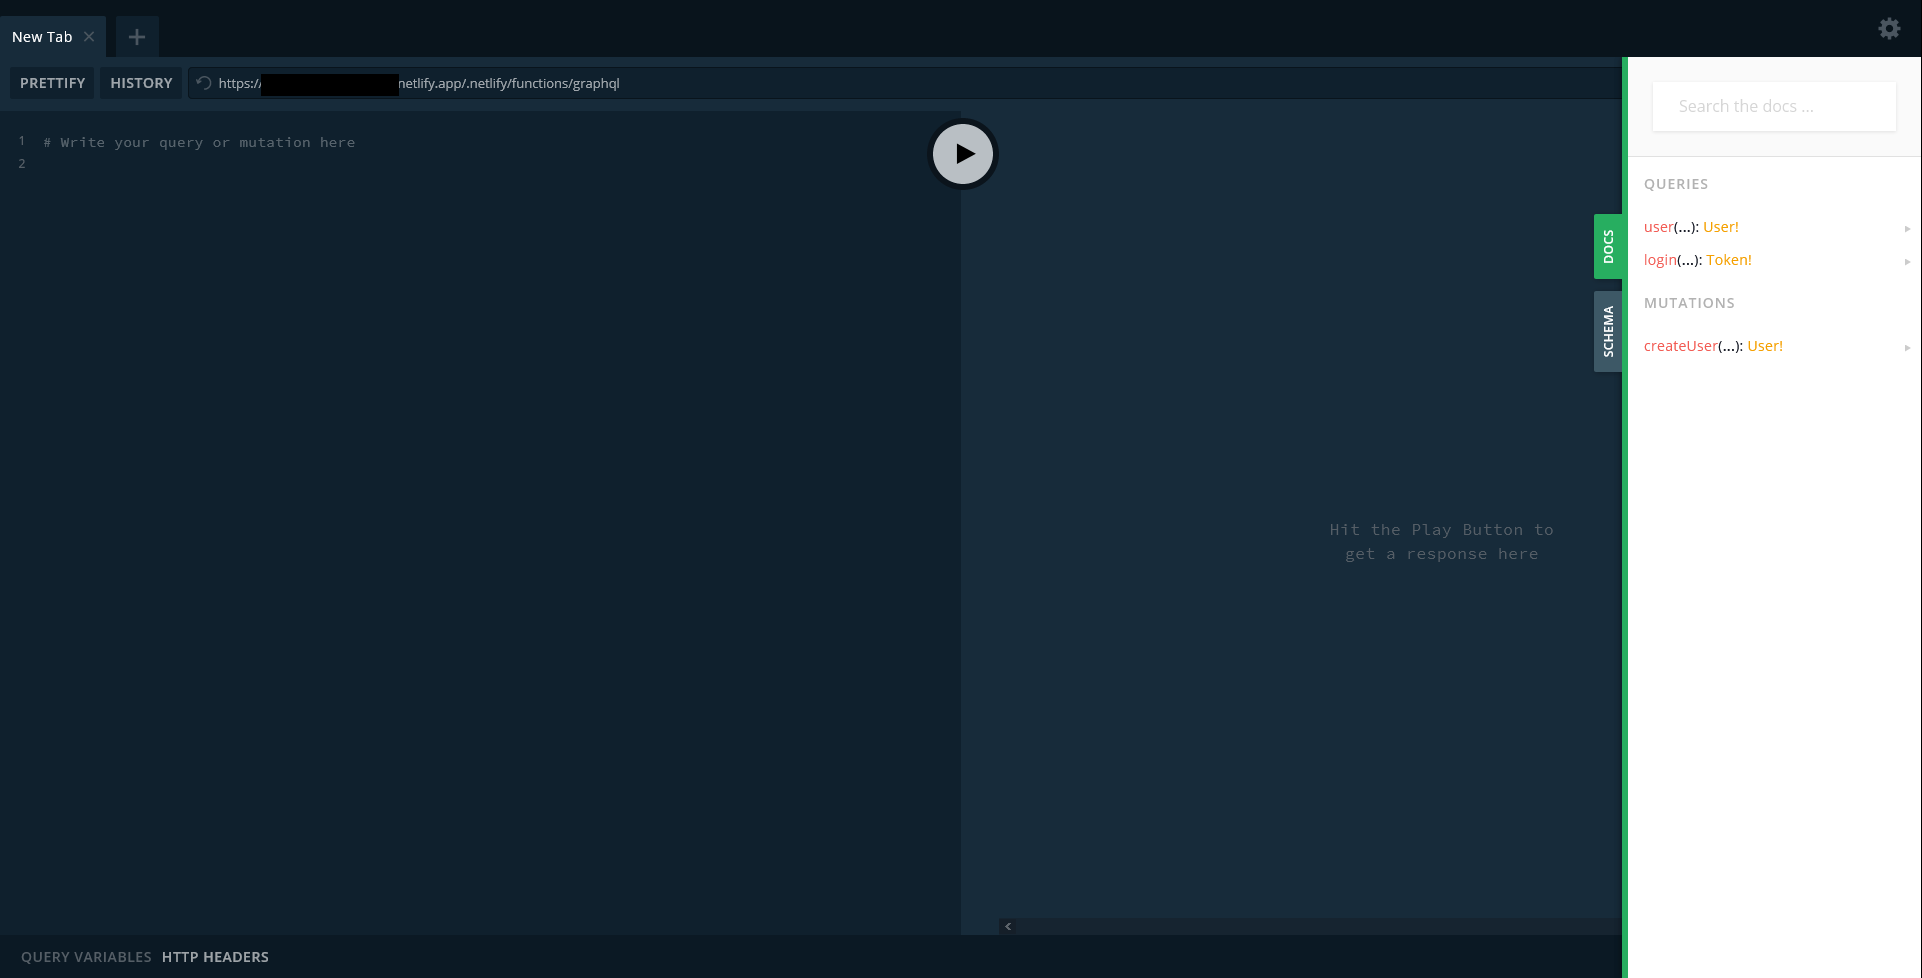
And TAAADAAAA…
That is because the endpoint is by default not the http://page/ but http://page/.netlify/functions/graphql.
How to fix it? It’s very simple. Just create _redirects with:
/ /.netlify/functions/graphql 200!Deploy again and check.
Hope you liked it! Feel free to improve and change.
Read more:
How not to kill a project with bad coding practices?
Web app security. Target=”_blank” vulnerability
Web app security – XSS vulnerability


