요즘에는 클라우드 솔루션에서 사무 전용 데스크톱 앱을 출시하고 있습니다. 구글에서 제공하는 가장 큰 오피스 제품군 중 하나는 문서, 스프레드시트, 프레젠테이션을 포함하므로 일반 사무실에 필요한 대부분의 기능을 갖추고 있습니다.
이 글에서는 Google 스프레드시트 앱을 자세히 살펴보고 Google 앱 스크립트를 사용하여 더욱 스마트하게 만드는 방법을 보여드리겠습니다.
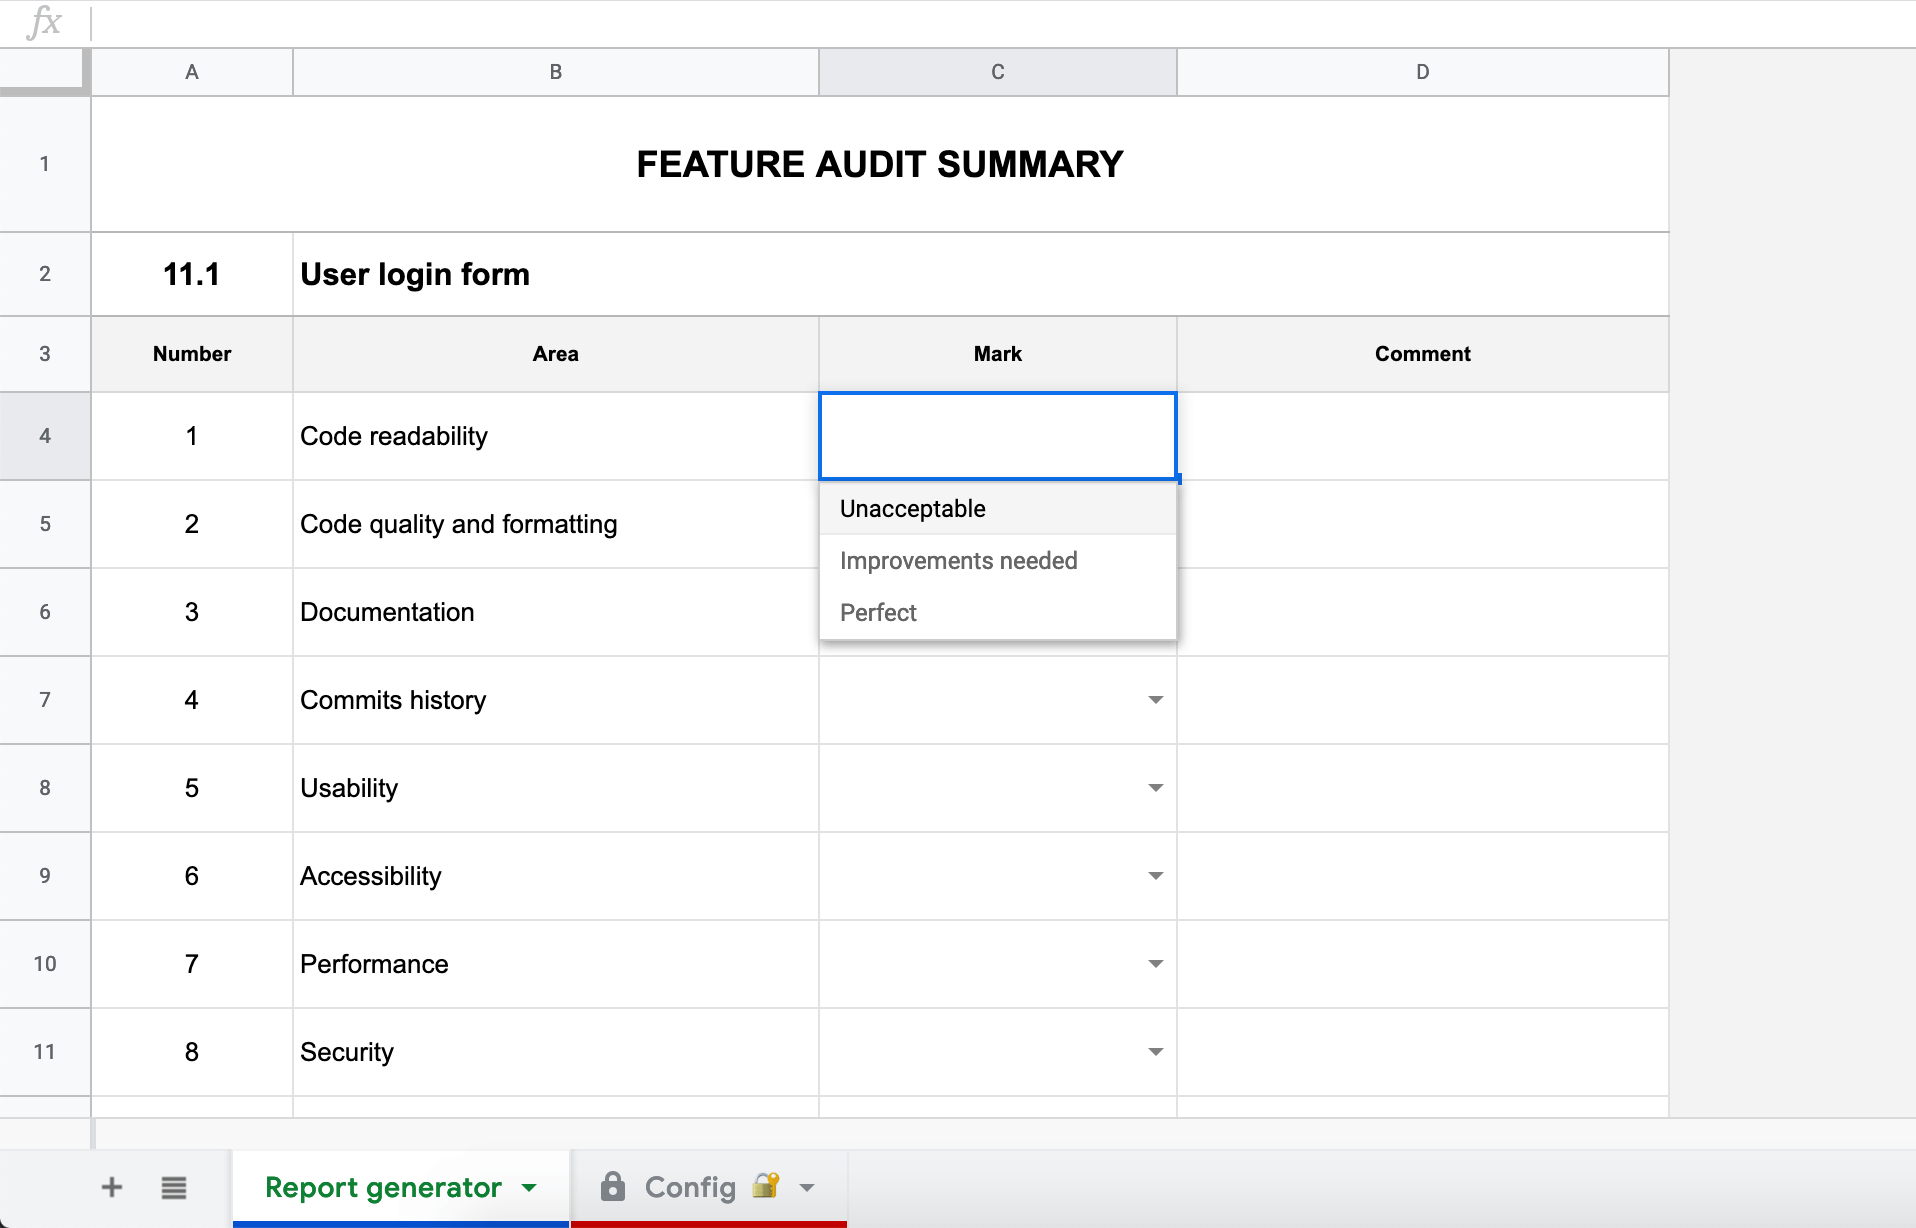
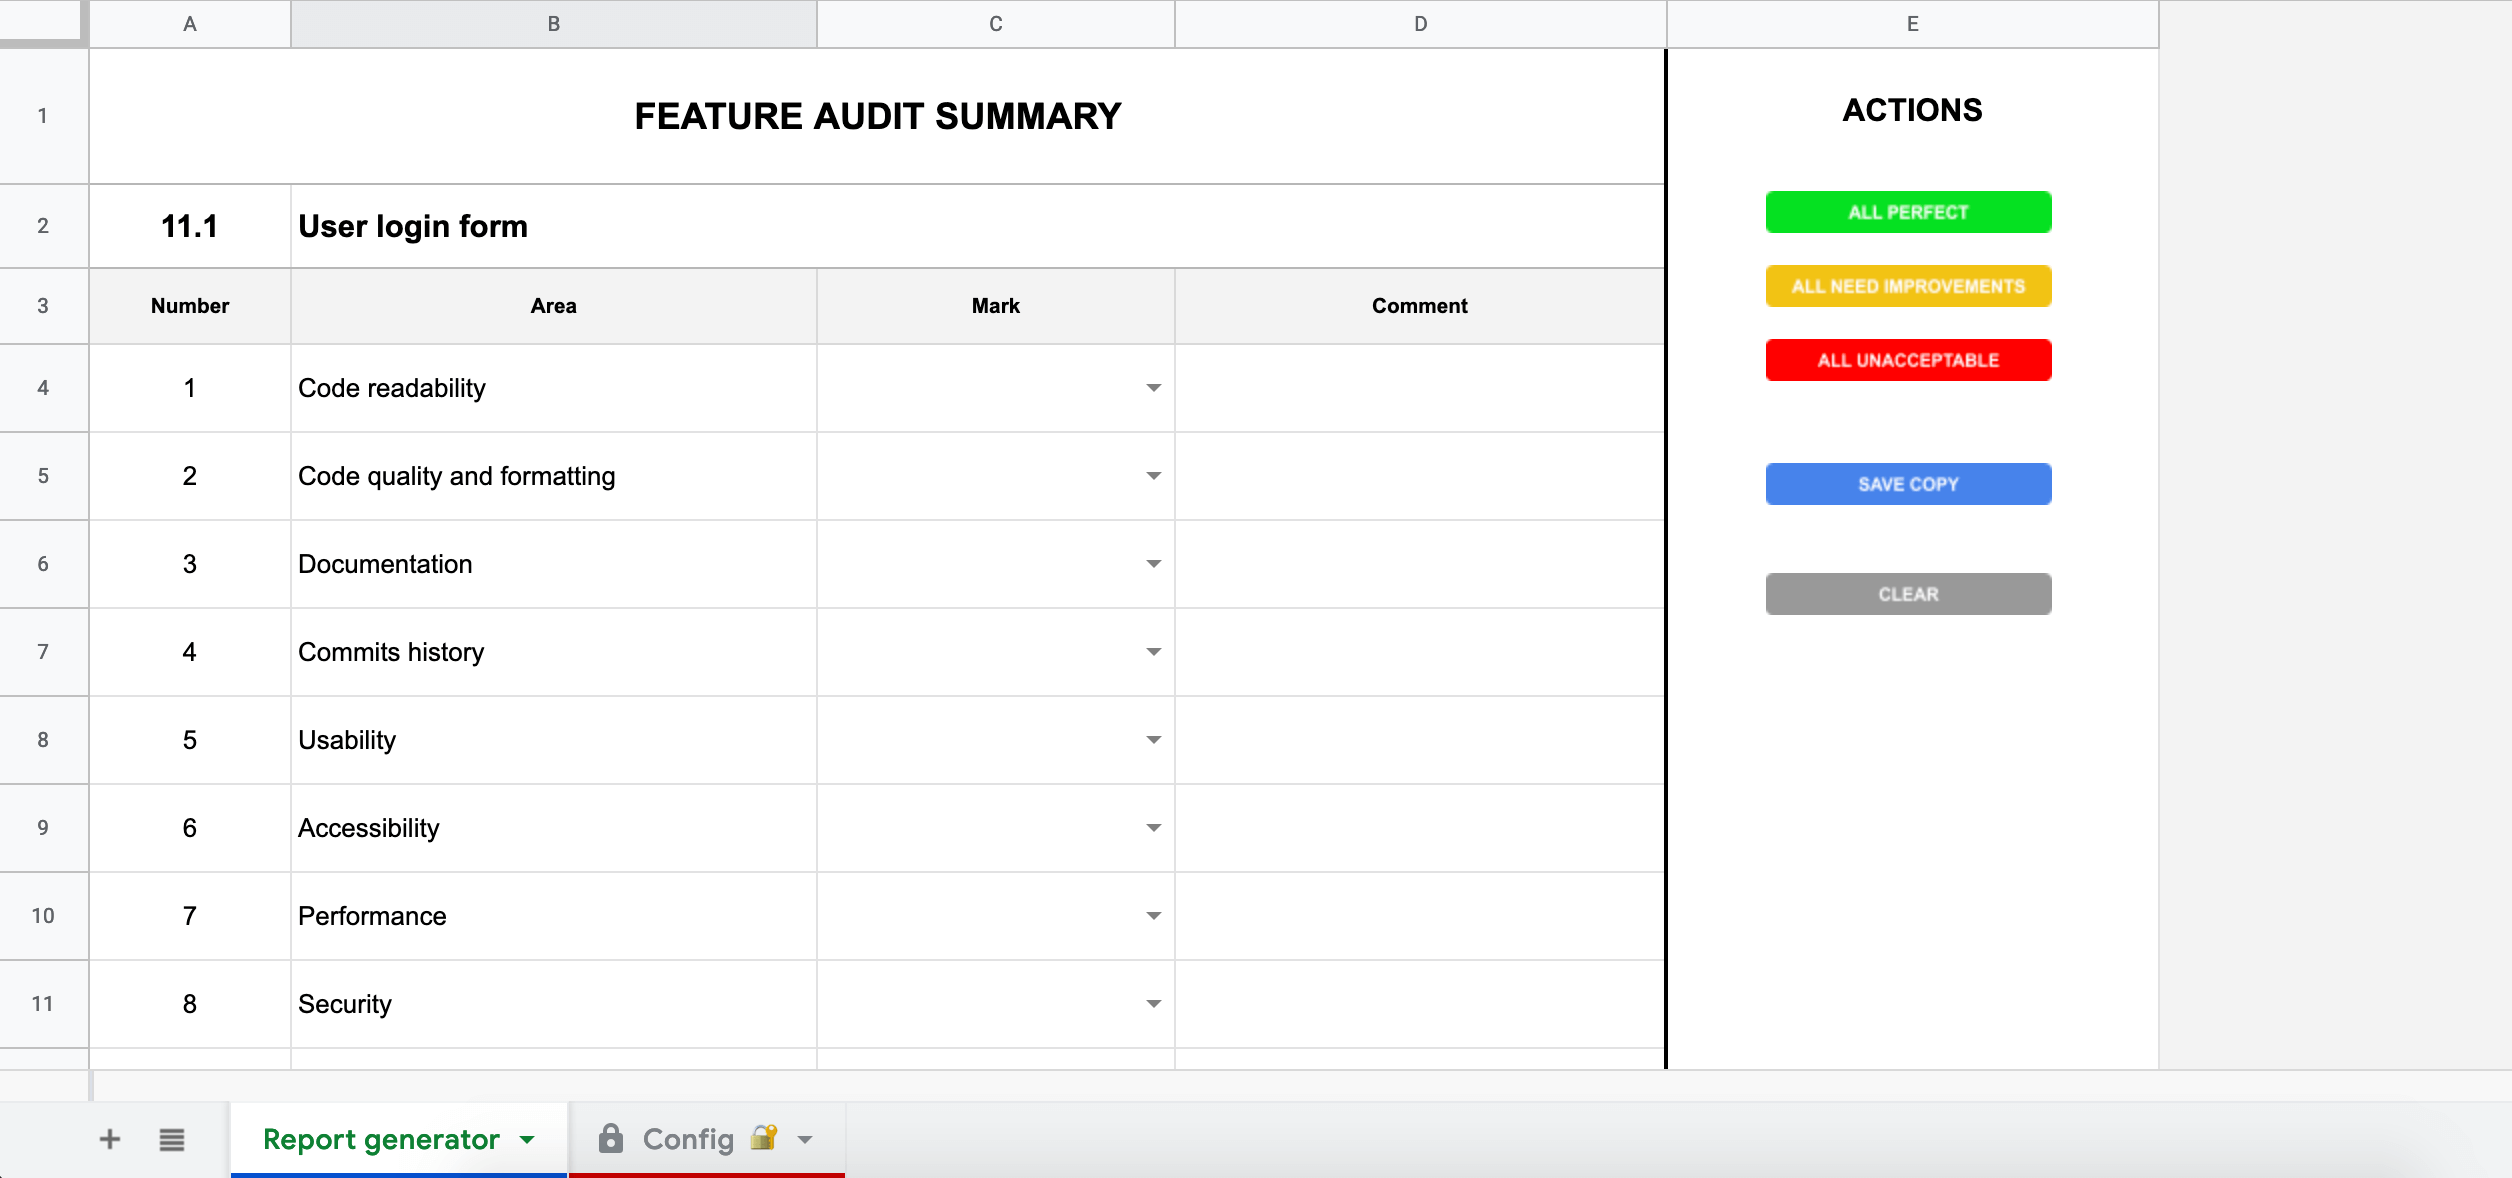
여러분의 업무가 다른 사람의 업무를 감독하는 것이며, 보통 보고서 작성으로 이어진다고 상상해 보세요. 표준화되고 일반적인 내용을 담고 싶어서 관리해야 할 항목의 목록과 의견을 적을 셀이 있는 스프레드시트를 만들었습니다. 여러분이 디지털 콘텐츠의 품질을 책임지고 있다고 가정해 봅시다. 제품. 그러면 스프레드시트가 다음과 같이 보일 수 있습니다:
위의 예에서 몇 가지 사항을 확인할 수 있습니다:
기능 이름("사용자 로그인 양식") 및 번호(예: ERP 시스템에서)를 입력합니다,
확인하고 피드백을 제공해야 하는 측면의 목록('영역' 열)을 표시합니다,
결론을 위한 빈 필드('댓글' 열)를 추가합니다.
이 시트는 '보고서 생성기'라고 부르는데, 이 문서가 어떻게 정말 유용한 도구로 발전하여 다른 사람의 작업 결과물의 품질을 평가할 수 있는지 보여드리려고 합니다.
결과를 정량화하려면 1~10점 등의 척도를 사용하는 것이 가장 좋은 방법일 것입니다.
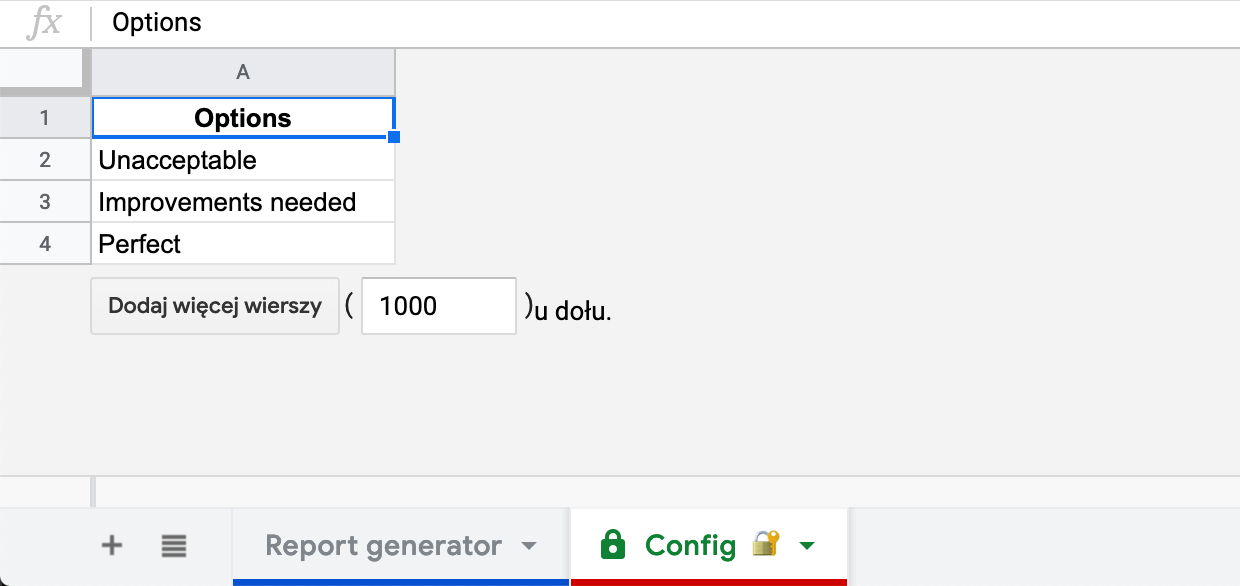
같은 문서에 새 시트를 만들어 "구성"이라고 부르고 보호된 것으로 정의해 보겠습니다(또는 최소한 이름에 자물쇠 이모티콘을 추가해 보겠습니다). 이 시트는 아래와 같이 미리 정의된 몇 가지 옵션만 보관하기 위한 것입니다:
이제 이러한 값을 드롭다운에 입력할 수 있습니다. 보고서 생성기 시트를 사용하여 데이터 유효성 검사 기능. 여기 에서 이를 달성하는 방법에 대한 몇 가지 지침을 찾을 수 있습니다:
이 작업을 완료한 후에는 다음을 사용하여 등급을 수치로 쉽게 변환할 수 있습니다. IF 공식을 사용하세요. 스프레드시트는 인간 친화적으로 유지되며, 동시에 결론을 정량화(측정 가능하고 비교 가능한)할 수 있습니다.
그러나 이 문서가 깔끔하게 정리되어 있지만 감사 가 늘어나면 확인해야 할 사항이 수백 가지가 됩니다. 빈 양식 템플릿을 저장하고 새 보고서를 작성해야 할 때마다 복사할 수는 있지만 문서 목록과 스프레드시트 사이를 전환하는 것은 매우 번거롭습니다. 바로 이 지점에서 자동화에 대해 생각하기 시작합니다.
지금이 바로 구글 앱스 스크립트로 모험을 시작하기에 완벽한 시기입니다!
코딩을 시작하기 전에 대량 작업을 위한 몇 가지 버튼을 준비해 보겠습니다. 위의 예시에 따라
모든 항목을 "완벽"으로 표시합니다.
모두 "개선 필요"로 표시합니다.
모두 "허용 안 됨"으로 표시합니다.
모두 재설정(값을 빈 문자열로 설정)합니다.
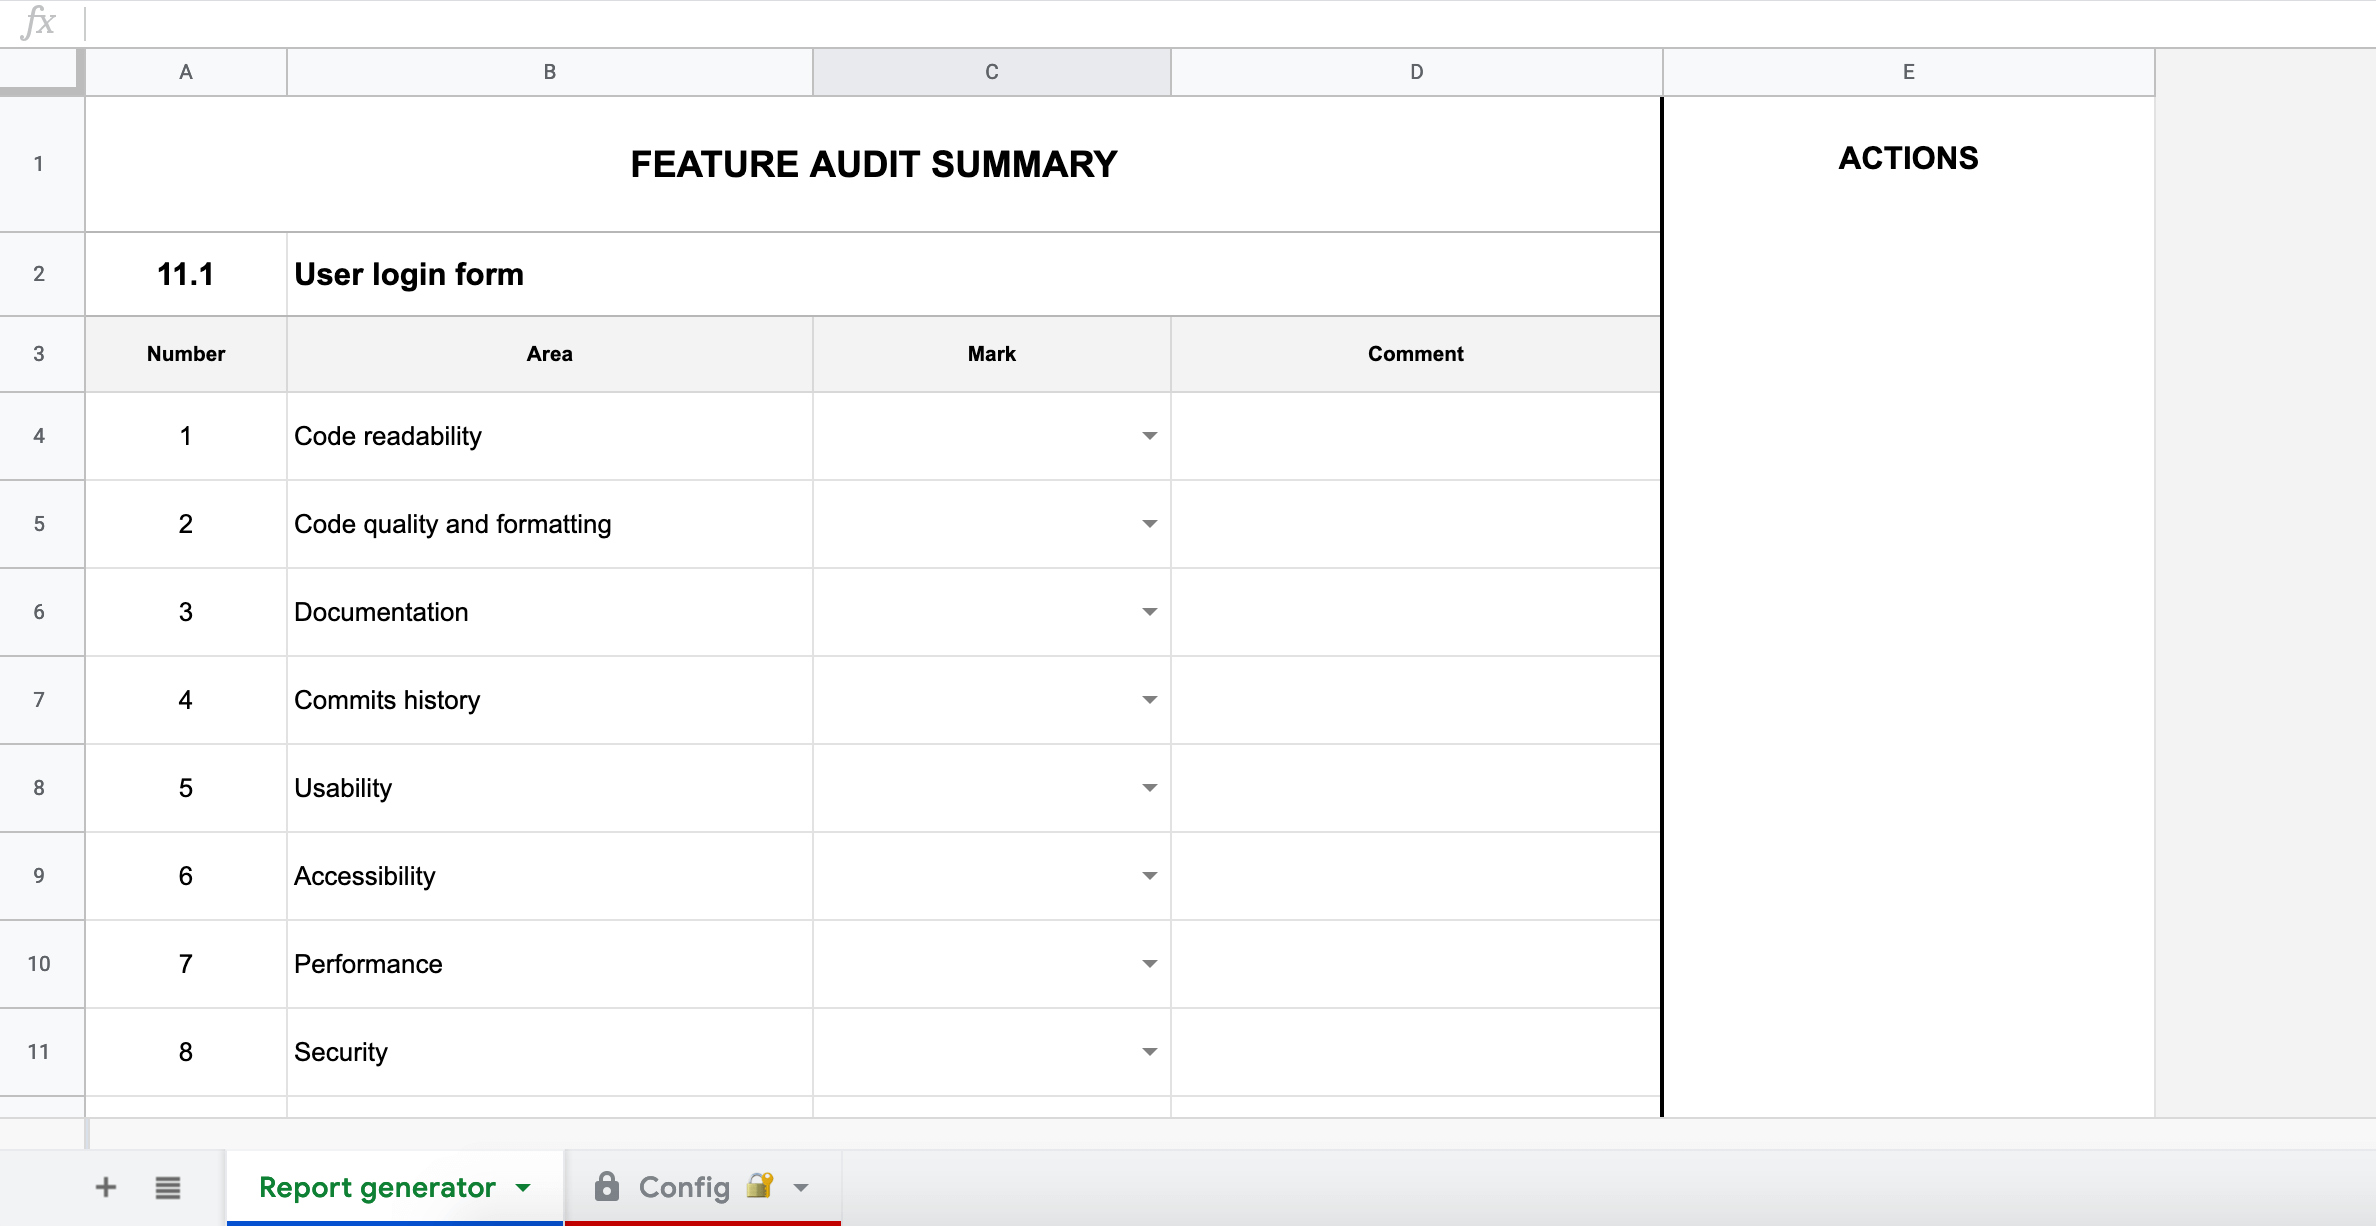
또한 감사가 완료되면 새 파일을 저장하려면 한 가지 추가 작업이 필요합니다.
먼저 보고서 생성기 버튼이 포함된 기능 영역이 있습니다.
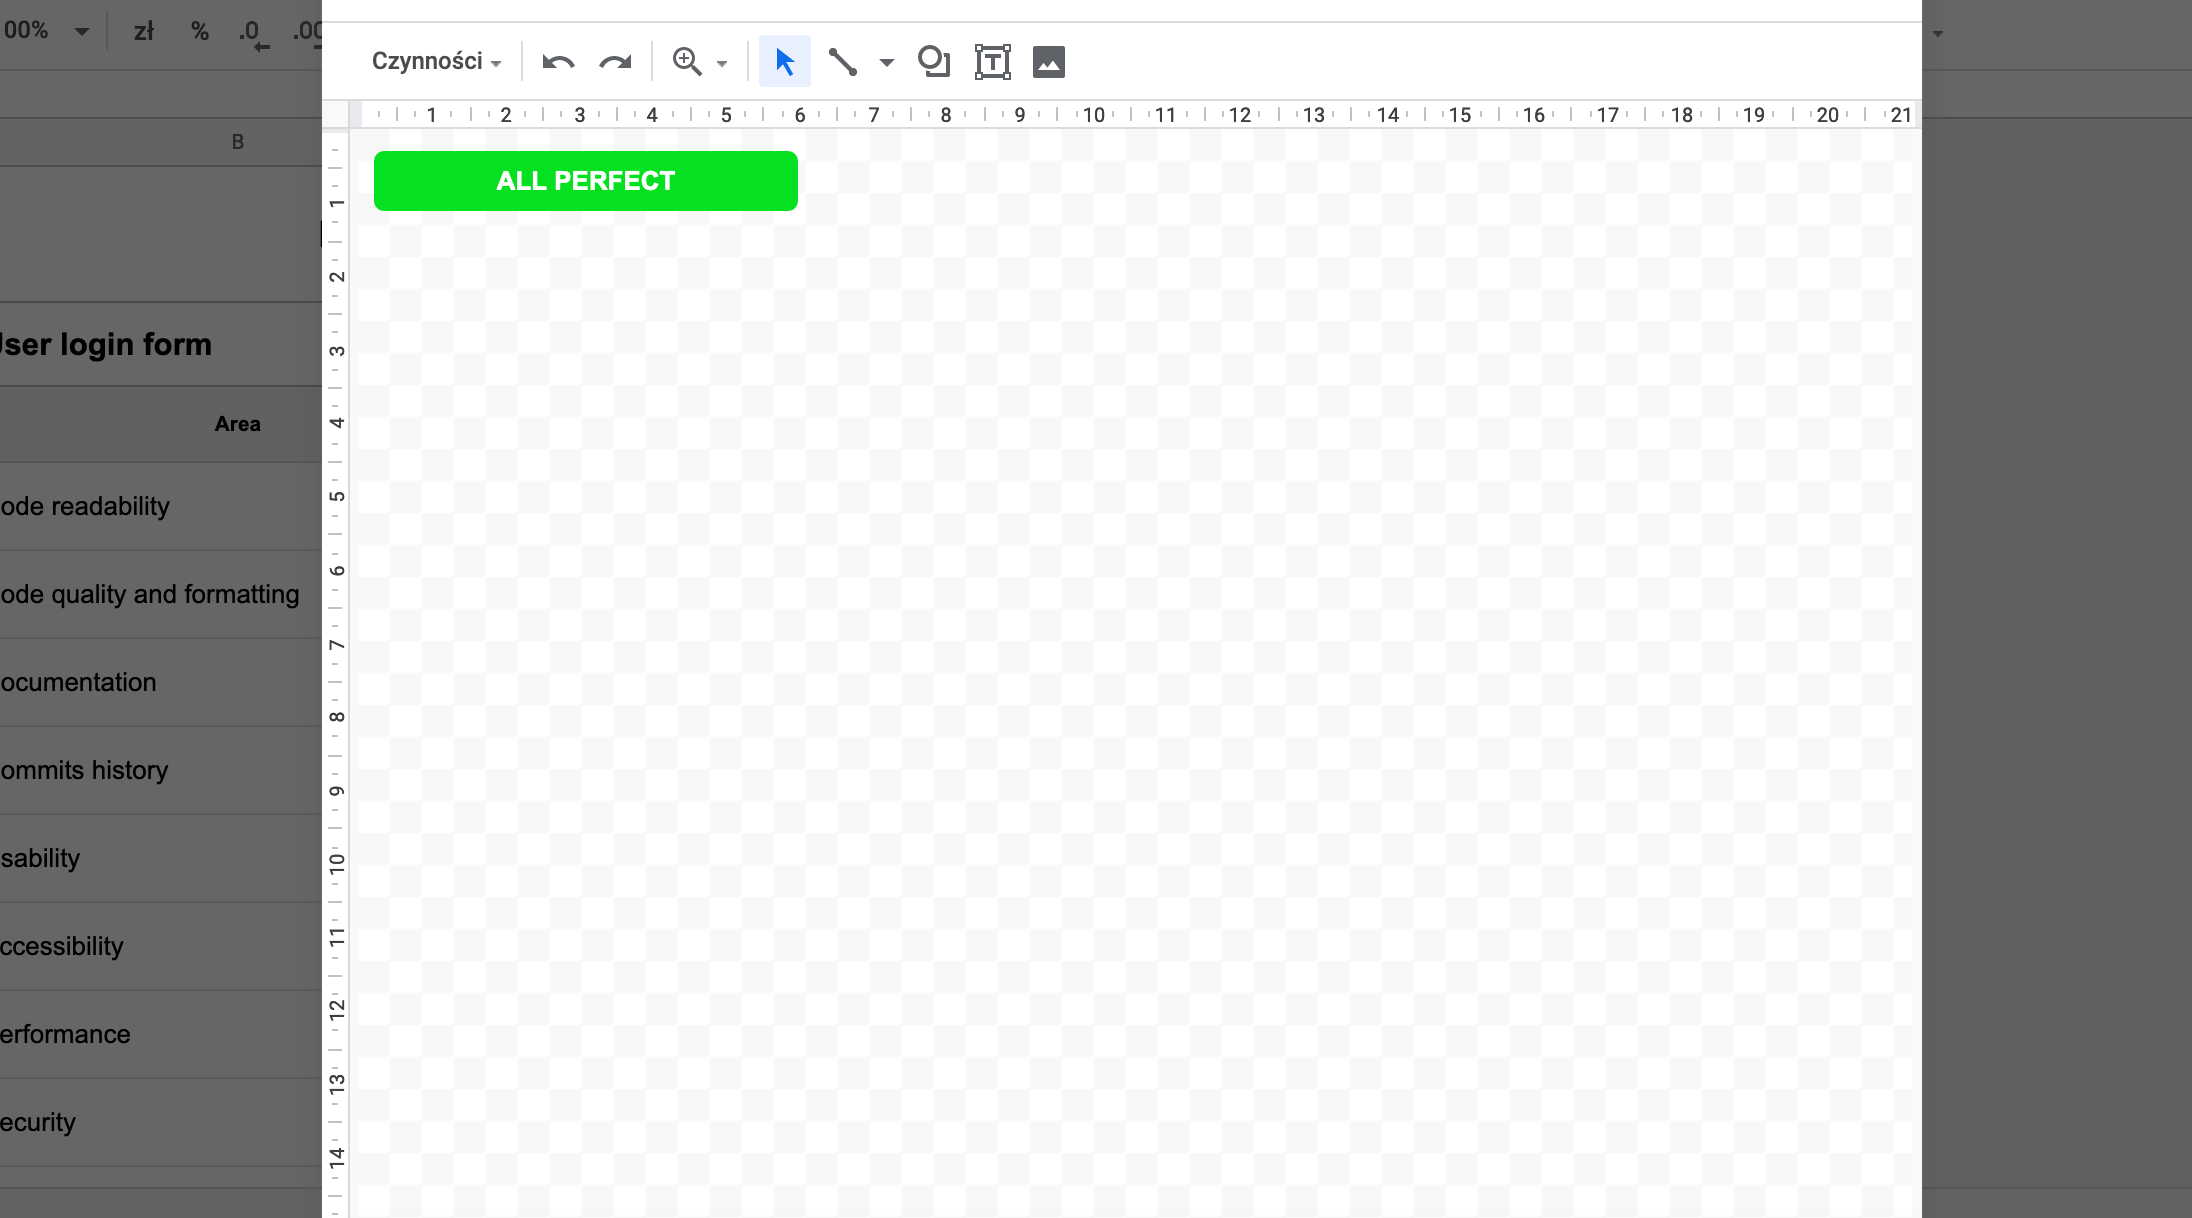
그런 다음 삽입 -> 그리기버튼을 하나씩 추가해 보겠습니다.
샘플 문서의 모습은 다음과 같습니다:
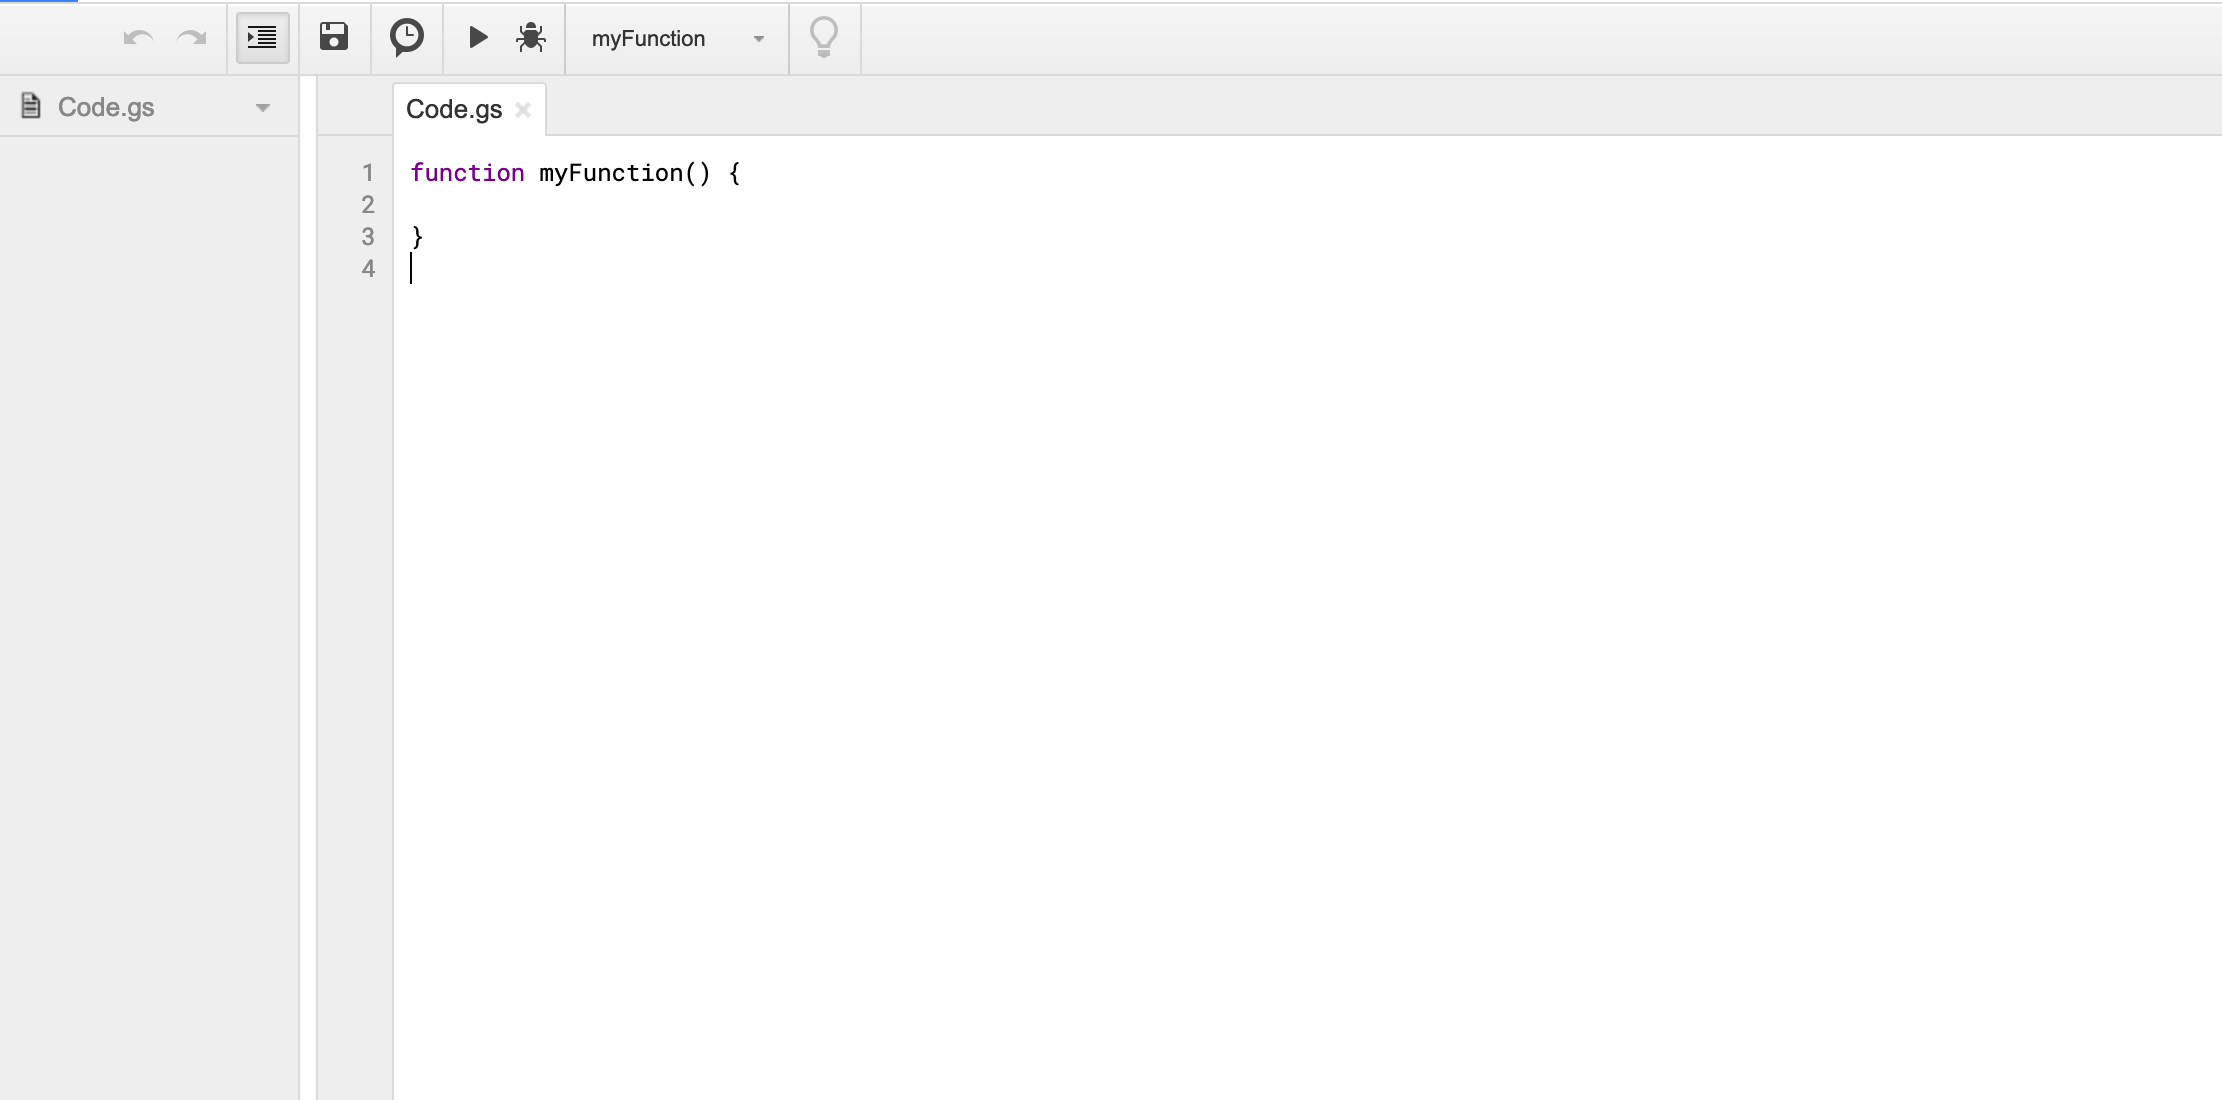
이 아름다운 UI에 로직을 추가할 준비가 되었습니다! 시작 방법은 매우 간단합니다. 도구 -> 스크립트 편집기 을 클릭하면 브라우저가 새 카드로 이동합니다.
에디터의 인터페이스는 매우 직관적입니다. 익숙한 사용자라면 코드 편집기를 사용하면 파일 이름을 쉽게 바꾸거나 새 파일을 만들 수 있습니다(파일 -> 새로 만들기 -> 스크립트 파일).
Google 앱 스크립트 는 JavaScript의 사촌에 불과합니다. JS를 알면 GS 숙련도도 달성할 수 있습니다!
첫 번째 단계는 필요한 모든 참조를 한곳에 모아 의미 있는 이름을 부여하는 것입니다. 기본값을 제거하여 전역 변수부터 시작하겠습니다. myFunction 선언에 더 유용한 것을 입력하고 Code.gs 파일을 만듭니다.
변 스프레드시트 = 스프레드시트앱.getActive스프레드시트()

// 시트 참조

var report = spreadsheet.getSheets()[0]
var config = spreadsheet.getSheets()[1]
활성 스프레드시트 가져오기 메서드를 사용하면 작업 중인 스프레드시트에 대한 참조를 얻을 수 있습니다,
getSheets 메서드에서 호출된 스프레드시트 인스턴스는 이 스프레드시트의 시트 배열을 반환합니다; 이 예제에서는 [보고서 생성기 시트입니다, 구성 시트] 배열입니다.
이제 한 걸음 더 나아가 스프레드시트에서 유용한 데이터를 가져올 수 있습니다.
// 편집 가능한 영역(드롭다운이 있는 셀)

var dropdowns = report.getRange('C4:C13')

// 자막이 있는 셀(기능 이름)

var featureName = report.getRange('B2').getValue()

// '구성' 시트의 옵션
// getRange() 메서드에 단일 셀을 전달할 수 있다는 점에 주목하세요.
// 옵션을 변경해도 스크립트의 기능에 영향을 미치지 않습니다.

var values = {
허용되지 않음: config.getRange('A2').getValue(),
improvements_needed: config.getRange('A3').getValue(),
perfect: config.getRange('A4').getValue(),
empty: ''
};
코딩할 남은 것은 버튼에 할당할 함수의 정의뿐입니다.
// 버튼 기능

함수 allPerfect() {
dropdowns.setValue(values.perfect)
}

function allNeedImprovements() {
dropdowns.setValue(values.improvements_needed)
}

function allUnacceptable() {
dropdowns.setValue(values.unacceptable)
}

function clear() {
dropdowns.setValue(values.empty)
}

function copy() {
var copy = spreadsheet.copy(featureName + ' - report')

// 이제 동일한 값을 가진 두 개의 시트를 복사했습니다.
// 하지만 이름이 변경되었습니다("copy" 접미사 포함),
// 이 경우 원래 이름을 붙여야 합니다.

// 보고서 시트 이름 바꾸기
copy.getSheets()[0].setName(report.getName())

// 구성 시트 이름 변경
copy.getSheets()[1].setName(config.getName())
}
그리고 copy() 메서드는 (이 예제에서는) 다음과 같은 이름의 새 스프레드시트를 자동으로 생성합니다. "사용자 로그인 양식 - 보고서"를 클릭하고 현재 항목 바로 옆에 있는 버튼을 클릭합니다.
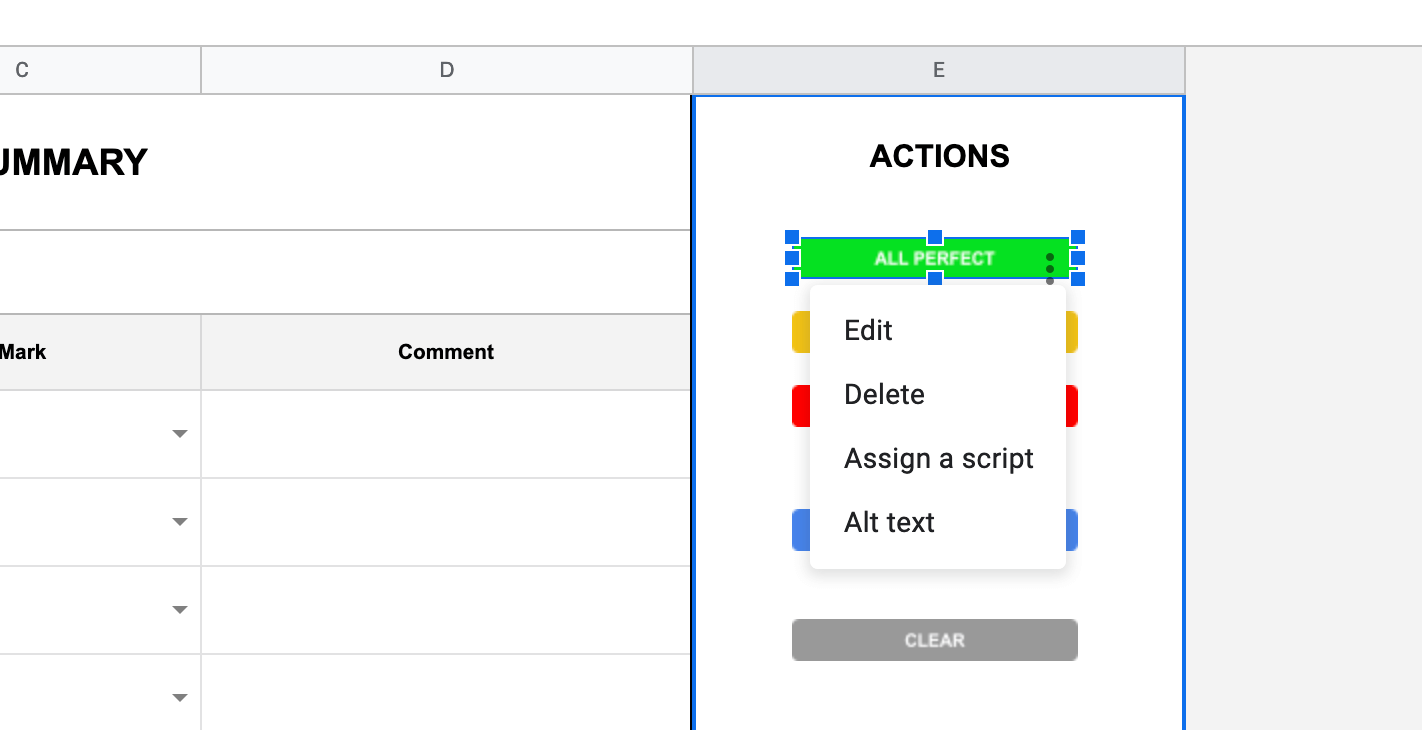
이전에 만든 버튼에 메소드를 할당합니다. 선택 스크립트 지정 버튼을 마우스 오른쪽 버튼으로 클릭한 후...
...그리고 메서드의 이름을 입력하면 다음과 같습니다. allPerfect
생성기를 닫을 필요는 없습니다. 대량 작업을 사용하여 새 보고서의 양식을 준비하고 기능 이름을 변경한 다음 다른 사본을 저장하세요!
다음과 같은 가능성 Google 앱 스크립트 는 그 범위가 너무 넓어서 모두 설명하려면 전체 기사가 필요할 정도입니다. 오피스 업무 최적화에 관심이 있으시다면 언제든지 공식 문서 시트를 더욱 스마트하게 만들어 보세요!
다음과 같이 정말 유용한 해킹 방법이 있습니다. 이것 에서 xfanatical.com Google 스프레드시트를 PDF로 내보내는 방법에 대해 설명합니다.
이 문서에 설명된 예는 다음과 같습니다. 여기. 마음에 드셨으면 좋겠습니다. 즐거운 시간 보내세요!